CAM, or Computer-Aided Manufacturing, is a powerful technology used in CNC machining. It involves using computer software to control and automate the manufacturing process, allowing for precise and efficient production of various parts and components. The purpose of this article is to provide you with a comprehensive 5-step guide to mastering CAM in CNC machining. We aim to simplify the complexities of CAM and make it easily understandable, even for young enthusiasts like yourself. By following these steps, you’ll gain the knowledge and skills necessary to excel in this exciting field of manufacturing.
Step #1: Understanding CAM Basics
CAM software comes with a range of features that enhance CNC machining capabilities. Here are some important ones to consider:
CAM generates precise toolpaths that guide the CNC machine’s cutting tools, ensuring accurate manufacturing. The software with simulation capabilities allows you to visualize the machining process before actually executing it, minimizing errors and optimizing efficiency. CAM also helps you manage materials efficiently, including selecting appropriate tooling, specifying cutting parameters, and optimizing material usage. CAM comes with a post-processing feature which enables the translation of CAM instructions into machine-specific code (G-code), ensuring compatibility between the software and CNC machine.
Step #2: Preparing the CAD Model
CAD and CAM go hand in hand. CAD software is used to create precise and detailed digital models of the desired part or component. CAM software, on the other hand, utilizes these CAD models to generate toolpaths and instructions for CNC machines. The accurate representation of the part in the CAD model is crucial for successful CAM programming.
A well-prepared CAD model forms the foundation for efficient CAM programming. It ensures that the generated toolpaths accurately reflect the intended design, resulting in precise and reliable machining outcomes. By taking the time to prepare a high-quality CAD model, you’ll minimize errors, reduce production time, and improve the overall manufacturing process.
When preparing a CAD model for CAM programming, consider the following best practices:
- Ensure that your model has clean and accurate geometry, with no overlapping or intersecting elements.
- Define appropriate tolerances for the dimensions and features of your model.
- Organize your CAD model by properly identifying and labeling features such as holes, pockets, and fillets.
During CAD model preparation, it’s important to avoid certain pitfalls that can lead to issues during CAM programming:
- Ensure that all required geometry is present and accurately represented in the CAD model.
- Define tolerances that align with your machining requirements to avoid discrepancies in the final product.
- Carefully identify and label features to prevent confusion or misinterpretation by the CAM software.
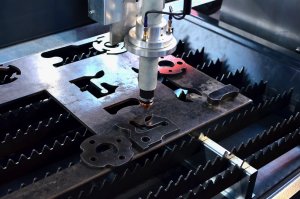
Step #3: CAM Toolpath Generation
Toolpath generation involves calculating the most efficient and precise path for the tool to follow, considering factors like part geometry, tool constraints, and machining operations. The toolpath defines the trajectory and sequence of movements required to shape the workpiece.
Different types of toolpaths are used in CNC machining, each serving a specific purpose. Here are a few common examples:
- Contouring
- Pocketing
- Drilling
When selecting toolpaths for specific machining operations, consider factors such as the desired surface finish, material properties, cutting tools, and machine capabilities. It’s important to choose toolpaths that optimize both cutting time and tool life, ensuring efficient and cost-effective manufacturing.
To optimize toolpaths, CAM software provides various techniques, including minimizing cutting time and reducing tool wear. These optimization techniques help improve efficiency, enhance tool performance, and deliver high-quality results.
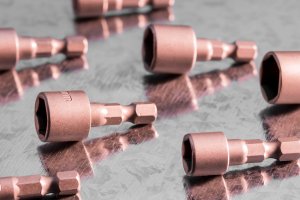
Step #4: Tool and Material Selection
Using the appropriate tools and materials ensures optimal performance, extends tool life, reduces machining errors, and enhances the overall manufacturing outcome.
When selecting cutting tools for CNC machining, consider the following factors:
Material Compatibility
Different materials require specific cutting tools designed to withstand their unique properties. Choosing tools suitable for the material being machined is vital for achieving accurate and consistent results.
Tool Geometry
Tool geometry, such as flute design, helix angle, and edge sharpness, affects chip evacuation, cutting forces, and surface finish. Selecting the right tool geometry for the machining operation enhances cutting efficiency and surface quality.
Coatings
Coatings can enhance tool performance by reducing friction, dissipating heat, and increasing wear resistance. Consider coatings like TiN, TiAlN, or DLC (Diamond-Like Carbon) to improve tool life and minimize material adhesion.
Different materials have varying hardness, toughness, thermal conductivity, and machinability characteristics. Understanding these properties helps in determining suitable tool materials, cutting speeds, feeds, and depths of cut. Consider factors like workpiece material composition, hardness, and heat sensitivity when selecting tools and planning the machining process.
Feeds and speeds refer to the rate at which the cutting tool moves through the material and the spindle speed, respectively. Proper selection of feeds and speeds is essential for efficient machining and surface finish. Factors to consider include tool diameter, cutting tool material, workpiece material, rigidity of the machine setup, and desired cutting forces. Consulting tool manufacturers’ recommendations, machining handbooks, or utilizing software-based calculators can aid in determining appropriate feeds and speeds for a given machining operation.
Step #5: Post-Processing and Simulation
The post-processing stage in CAM programming involves converting the toolpath information into machine-specific instructions, typically in the form of G-code. It is the final step before implementing the CAM program on the CNC machine. Post-processing ensures that the generated toolpath is compatible with the specific machine controller and adheres to its syntax and formatting requirements.
In the post-processing stage, common tasks include:
- Generating G-code
- Optimizing tool change sequences to minimize tool change time and maximize machining efficiency.
- Some machines may have specific functions or commands that need to be incorporated into the post-processed code.
To verify and validate the CAM program, it is advisable to utilize simulation software. Follow these recommendations:
- Select a reliable simulation software that accurately represents the CNC machine’s kinematics, tooling, and material properties.
- Import the CAM program and simulate the machining process to visualize tool movements, check for collisions, and verify the expected results.
- Analyze simulation results, compare them to the desired outcomes, and make necessary adjustments to optimize the program if needed.
Related Posts
- Nickel vs. Cobalt Alloys in High-Temperature CNC Machining: A Detailed Analysis?
Nickel and Cobalt Alloys in High-Temperature CNC Machining Both Nickel and Cobalt alloys play an essential role in high-temperature CNC machining. These metal alloys are popular choices due to their…
- Mastering the Craft of Bead Blasting in CNC Machining(cnc machining tools Bblythe)
In the dynamic world of computer numerical control (CNC) machining, bead blasting is a pivotal process that contributes significantly to the quality and appearance of machined products. It's frequently used…
- Precision CNC Machining of Steel: High-Volume Production
Precision CNC Machining and High-Volume Production As an integral part of modern manufacturing processes, Precision Computer Numerical Control (CNC) machining brings about unmatched accuracy and consistency in the production of…