Introduction
When I first got into mechanical design, blind rivets were just something I saw used on factory floor panels. I didn’t think much of them until a project came along that required joining thin aluminum sheets—no access from the backside, no heat allowed, and the parts had to stay flush. That’s when blind rivets went from background detail to critical hardware in my toolbox.
In this guide, I’ll walk you through everything I’ve learned from working with blind rivets in real-world applications—especially how they pair with CNC drilling to deliver reliable, high-speed assembly in sheet metal, machinery, and even automotive applications. Whether you’re new to blind rivets or just need better results, this guide is built to help.
We’ll cover what blind rivets are, how CNC drilling fits into the equation, how to match rivets to drilled holes, and how to fix common problems when things go wrong.
Chapter 1: What is a Blind Rivet?
A blind rivet, sometimes called a pop rivet, is a type of fastener designed to join two or more materials when you can’t access both sides. That’s why they’re called “blind”—you install them from one side only.
How It Works
Here’s a simple breakdown:
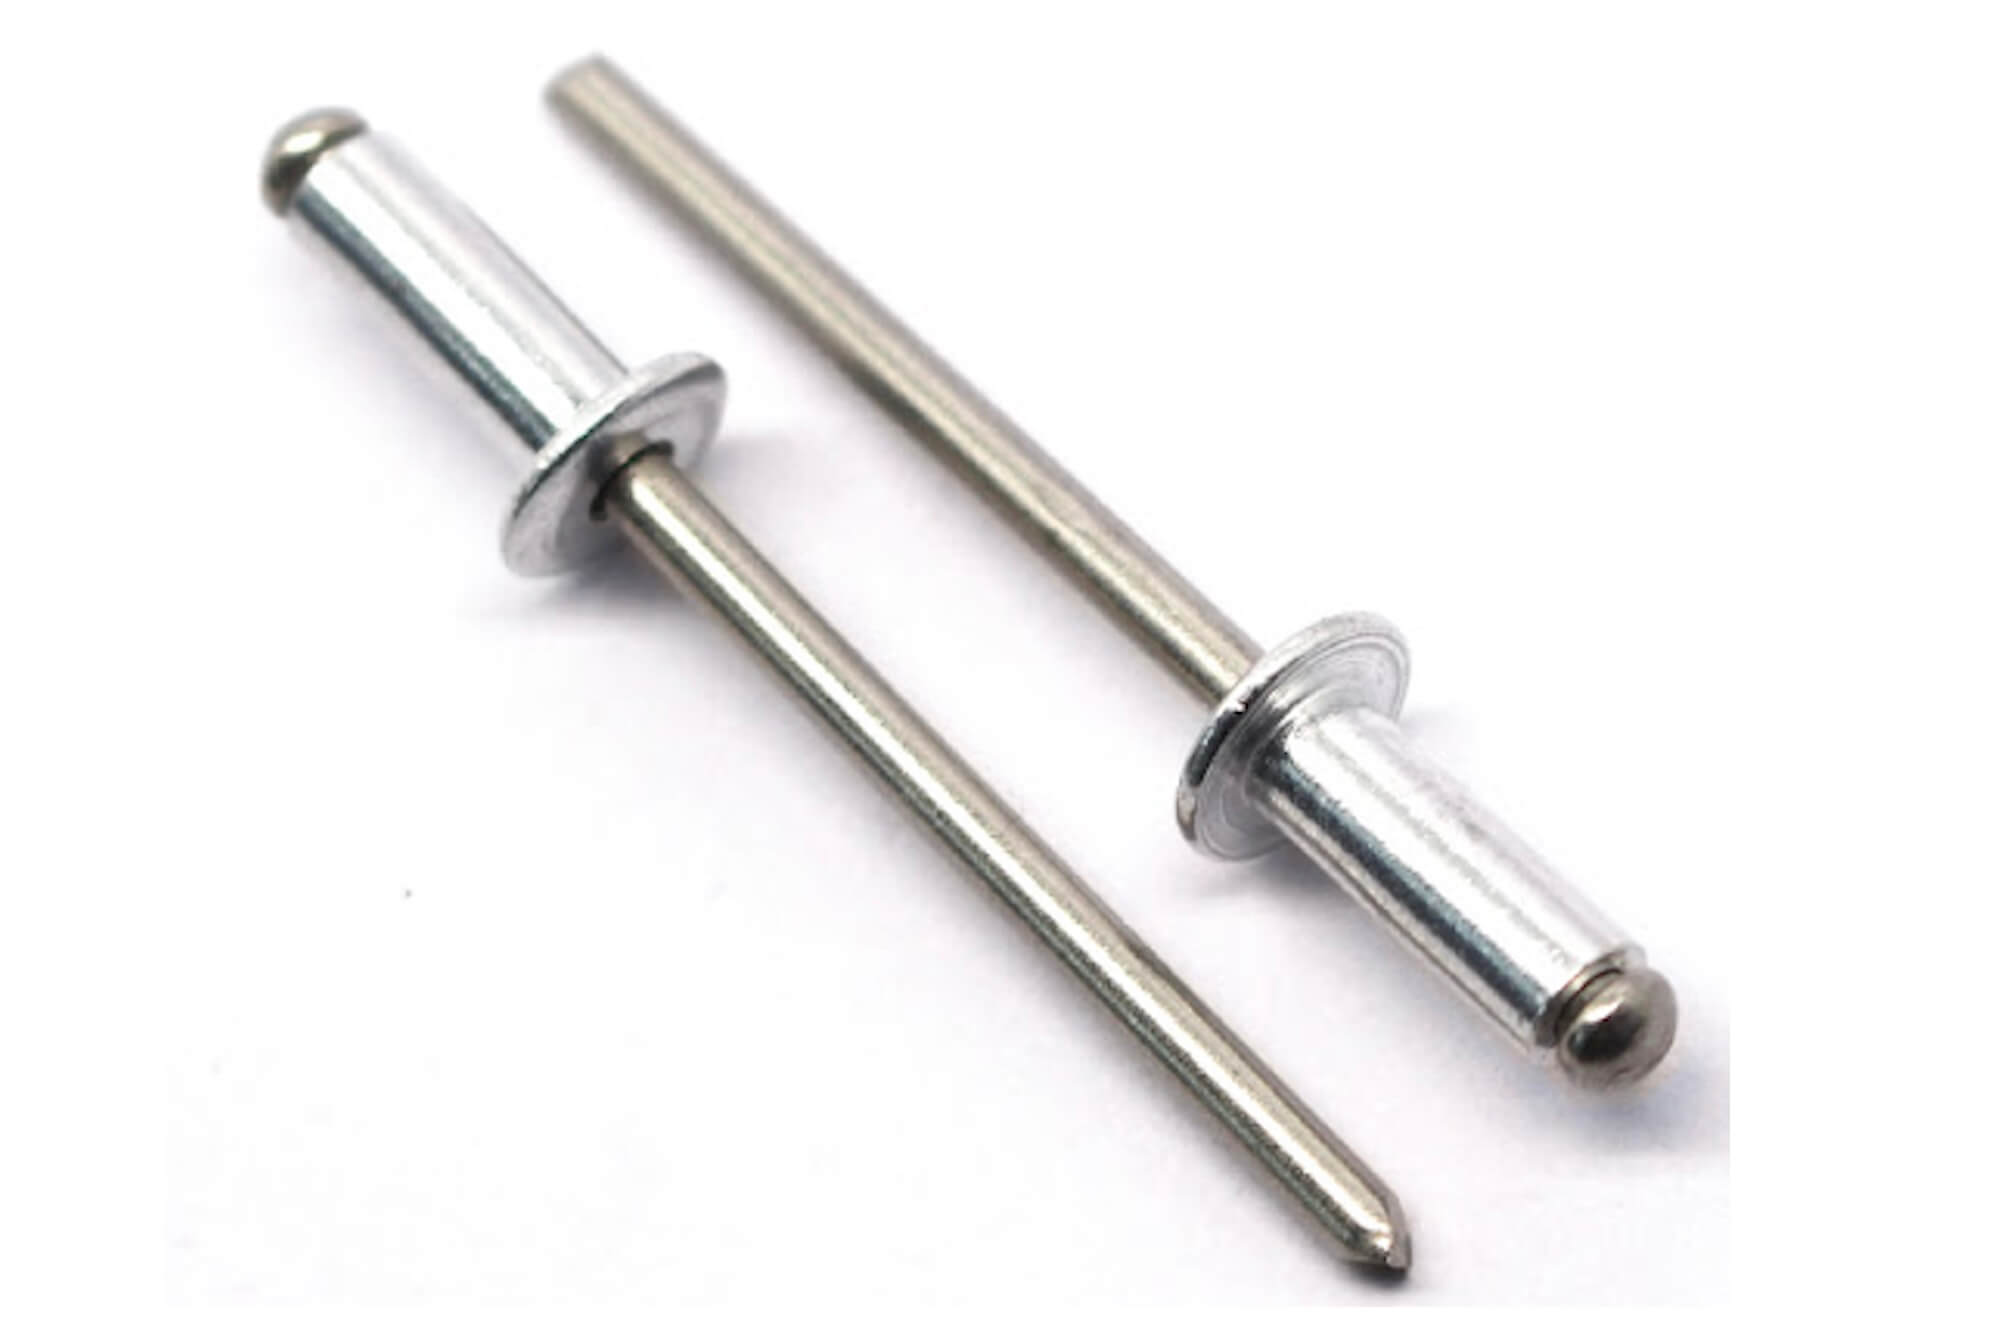
- A blind rivet consists of two parts: the body (or sleeve) and a mandrel (a long pin).
- You insert the rivet into a pre-drilled hole.
- Using a rivet gun, you pull the mandrel while holding the body in place.
- The body expands inside the hole and clamps the material.
- The mandrel breaks off, leaving a clean, finished look.
Blind rivets are especially useful in:
- Sheet metal fabrication
- Tubular assemblies
- Aerospace and automotive repairs
- Enclosed frames or structures
Types of Blind Rivets
I’ve used different types depending on strength, vibration resistance, or water-tightness needs. Here are the main types:
| Type | Description | Best Used For |
|---|---|---|
| Open-End | Most common type, fast and economical | General assembly |
| Closed-End | Sealed end for watertight joints | Electronics, HVAC, marine |
| Multi-Grip | Adapts to varying material thicknesses | Projects with inconsistent material |
| Peel-Type | Splits into legs for soft/brittle materials | Plastics, composites |
Each type has its own strengths. For example, I used closed-end rivets when building an outdoor control box—no water leaks after 3 years in the rain.
Advantages Over Welding or Screws
- No heat: No thermal distortion or hazard
- No thread tapping: Simplifies process
- One-side access: Great for enclosed assemblies
- Clean finish: Flush and consistent look
- Vibration resistance: Often more secure than screws
That one-side installation is what sold me. I couldn’t weld or screw from behind a CNC enclosure panel, and blind rivets saved hours of labor.
Chapter 2: CNC Drilling for Rivet Installation
When I started working with blind rivets, I quickly learned that most problems don’t start during the riveting itself—they start during drilling. And if you’re using CNC machines to prepare rivet holes, precision is both your best friend and biggest challenge.
Let’s break down why CNC drilling is the gold standard for rivet prep, and how to get it right.
Why Use CNC for Rivet Holes?
CNC (Computer Numerical Control) drilling ensures:
- Consistent hole size and depth
- Perfect alignment across multiple parts
- Repeatable accuracy, especially in batch production
- Minimal human error, which is crucial when working with tight tolerances
Blind rivets demand holes that are just right. Too small, and the rivet won’t insert. Too large, and you lose grip strength or introduce vibration-related failures. CNC machines help strike this balance every time.
Hole Diameter and Tolerance Control
The ideal hole diameter depends on both the rivet body and the material being joined. As a general rule, I aim for a hole that’s 0.1–0.3 mm larger than the rivet’s body diameter.
| Rivet Body Diameter (mm) | Recommended Hole Diameter (mm) | Tolerance Range (mm) |
|---|---|---|
| 3.2 mm | 3.3–3.4 mm | ±0.05 mm |
| 4.0 mm | 4.1–4.2 mm | ±0.08 mm |
| 4.8 mm | 4.9–5.0 mm | ±0.10 mm |
| 6.4 mm | 6.5–6.6 mm | ±0.10 mm |
I once ran into a project where 4.8 mm rivets were going into 5.3 mm holes. The joints rattled under minor vibration—totally avoidable had the holes been drilled to spec.
Recommended Drill Bits & Feeds
For clean, burr-free holes:
- Use split-point drill bits or carbide bits for aluminum/stainless
- Keep feed rate moderate to avoid heat buildup
- Back the material or use peck drilling to prevent burrs on exit
| Material | Drill Speed (RPM) | Feed Rate (mm/rev) |
|---|---|---|
| Aluminum | 3000–6000 | 0.05–0.2 |
| Mild Steel | 1000–2000 | 0.05–0.15 |
| Stainless Steel | 500–1200 | 0.02–0.10 |
Deburring and Chamfering
After drilling, clean holes are essential for proper rivet seating. I typically:
- Deburr both sides of the hole
- Apply a light 90° chamfer (0.5–1.0 mm) to prevent material rise or cracked edges
Skipping this step has cost me. Once, a missed burr scratched the mandrel, and the rivet wouldn’t pull. We had to rework 200 parts.
CNC Setup Tips
- Use fixture plates or vacuum tables to stabilize thin sheets
- Minimize vibration—especially with small-diameter holes
- Use multi-head CNCs or tool changers for volume jobs
CNC and blind rivets pair well when both are dialed in. Clean holes mean smooth installations—and fewer callbacks from quality control.
Chapter 3: Matching Rivet to Hole – Sizing & Compatibility
Getting the hole right is only half the battle. If your blind rivet and hole don’t match, the result can range from frustrating to catastrophic. I’ve been there—rivets that spin in the hole, collapse unevenly, or flat-out fall out.
This chapter focuses on how to match your rivet choice to your material thickness, type, and hole diameter.
Choosing the Right Rivet Diameter
The rivet body diameter should be appropriate for:
- The material thickness
- The loads expected in the joint
- The hole tolerance you’re working with
Larger rivets offer better shear strength but require wider holes and more mandrel force. Smaller ones are faster to set but may loosen under vibration.
Material Compatibility: Avoiding Galvanic Corrosion
Here’s something I learned working with aluminum panels and steel rivets: not all metal pairs play nice. If you mix dissimilar metals, especially in humid or marine environments, you risk galvanic corrosion.
| Rivet Material | Best Matched Base Material | Avoid Pairing With |
|---|---|---|
| Aluminum | Aluminum, plastic | Stainless steel (moist env.) |
| Steel | Steel, painted metals | Bare aluminum |
| Stainless Steel | Stainless steel, glass-reinforced plastics | Raw aluminum (unless anodized) |
If unsure, use same-metal rivets or add an isolation washer.
Grip Range: The Hidden Detail Most People Miss
Every blind rivet has a grip range—the minimum and maximum material thickness it can clamp. Choose a rivet that fits the total thickness of your joined parts.
| Rivet Size | Grip Range | Use Case |
|---|---|---|
| 3.2 x 6 mm | 1.5–3.5 mm | Thin panels, enclosures |
| 4.8 x 10 mm | 3.0–6.0 mm | Sheet metal frames |
| 6.4 x 12 mm | 5.0–9.0 mm | Automotive body, structural assemblies |
Once, I mistakenly used a 4.8 mm rivet with a 1.0 mm panel. The rivet didn’t expand fully and left a gap. Always check grip range—it’s listed in product data sheets.
Rivet Types for Different Conditions
- Multi-grip: Best for varying panel thickness
- Sealed/closed-end: Required in watertight or dustproof applications
- High-strength rivets: For dynamic loads (e.g., in automotive or aviation)
For production, I keep a rivet sizing chart at my workstation—it saves time and prevents costly errors.
Chapter 4: Blind Riveting Process Flow
In theory, installing a blind rivet is simple. In practice, I’ve seen plenty of installations fail because one or two steps were rushed or skipped. It’s not just “drill and squeeze”—there’s a right way to do it, especially if you’re aiming for repeatable, durable, and clean results in a production setting.
Here’s the full rivet installation flow I’ve followed for years:
Step 1: Design with Riveting in Mind
Even before drilling starts, design decisions can affect rivet success:
- Allow proper edge distance: I use at least 2× rivet diameter from the sheet edge to avoid tearing.
- Plan access for tooling: Especially with deep enclosures or small cavities.
- Factor thermal expansion: Rivets don’t allow movement. Use expansion joints for dissimilar materials.
Step 2: Drill (or CNC) the Hole
Use CNC drilling where possible for precise, repeatable results. For small runs, manual drilling works—just maintain speed/feed consistency and keep drill bits sharp.
✅ Cleanliness is non-negotiable. Blow out chips. Deburr both sides.
Step 3: Optional Chamfering
While not always mandatory, a light chamfer (0.5 mm x 45°) helps:
- Prevent cracking or “bulging” near the hole
- Ensure better seating of the rivet head
- Improve appearance for flush-head rivets
Step 4: Insert the Blind Rivet
Slide the rivet into the hole, ensuring:
- It sits flush with the material surface
- The mandrel is clean and undamaged
- There’s no angle misalignment (common with soft or thin panels)
Step 5: Riveting – Choose Your Tool
There are three main tool types for blind rivet installation:
| Tool Type | Pros | Best For |
|---|---|---|
| Hand Rivet Gun | Cheap, portable | Low-volume work, field jobs |
| Pneumatic Riveter | Fast, consistent pull force | Medium to high-volume shops |
| Battery-Powered | Cordless, ergonomic | Mobility with power |
I personally favor pneumatic guns for workshop jobs—they’re faster and less tiring than manual tools.
Step 6: Mandrel Break-Off and Clean-Up
As the mandrel breaks off, listen and feel for a clean snap. Some signs of poor installation:
- Cracked or distorted material
- Mandrel not fully broken
- “Mushroom” formation on soft materials
After riveting:
- Check the joint: Tug or twist lightly to check grip.
- Collect mandrel tips: They can damage electronics or attract rust.
Step 7: Visual and Manual Inspection
Things I always check:
- Flush head with minimal gaps
- No cracks, dents, or bulges around hole
- Firm joint with no movement
- Full mandrel removal (unless sealed rivet type)
In production, I also recommend:
- Spot checks with go/no-go gauges
- Surface quality audits under proper lighting
A well-installed blind rivet is fast, clean, and secure. But like anything in manufacturing, it’s all about process control. If you follow the flow, failures drop to near zero.
Chapter 5: Common Materials and Surface Considerations
What you’re riveting into matters just as much as the rivet itself. Over the years, I’ve worked with aluminum, stainless steel, painted panels, and plastic composites—and each material type changes the game a little.
Here’s how to handle common base materials when working with blind rivets.
1. Aluminum Panels
✅ Most compatible with aluminum or steel rivets
✅ Soft, so you need careful clamping to avoid bulging
- Use flanged heads to distribute load
- Choose aluminum rivets for weight savings
- Avoid mixing with stainless unless isolated (corrosion risk)
Aluminum is my go-to for lightweight builds. But on thin sheets (<1 mm), over-compression can wrinkle the panel—use peel-type rivets instead.
2. Stainless Steel Components
✅ High-strength
⚠️ Requires higher mandrel pull force
⚠️ Galvanic corrosion risk with aluminum rivets
- Use stainless rivets only
- Pre-drill carefully: stainless work-hardens quickly
- Check CNC feeds to prevent burnishing
I once built a bracket from brushed stainless and cheaped out on aluminum rivets. Within months—white powder corrosion. Lesson learned.
3. Painted, Coated, or Anodized Surfaces
✅ Clean finish, but must protect surface integrity
- Back off RPMs during drilling to reduce heat
- Always debur & clean holes before riveting
- Choose color-matched or anodized rivets for aesthetics
Don’t forget: paint can “stack” in the hole, reducing diameter. I always measure twice before committing.
4. Composites and Plastics
✅ Use peel-type or trifold rivets
⚠️ Prone to cracking under radial force
- Pre-drill with sharp bits
- Go slow to prevent melting
- Consider rivets with wide back-flange or split-leg designs
On a composite drone frame project, we switched to peel-type rivets and solved 80% of stress cracking during testing.
Galvanic Compatibility: A Must-Know Chart
| Rivet Material | Avoid Contact With | Safe Matches |
|---|---|---|
| Aluminum | Stainless steel (wet environments) | Aluminum, plastic, painted steel |
| Steel | Raw aluminum | Painted steel, steel |
| Stainless Steel | Raw aluminum (without isolation) | Stainless steel, coated panels |
If in doubt, I always add a nylon washer between the rivet and the surface.
Chapter 6: Troubleshooting Blind Riveting Problems
No matter how well you plan, something can go wrong during blind rivet installation. I’ve faced it all—rivets that wouldn’t pull, holes too big, rivets spinning in place, and even cracked components.
Here’s a breakdown of the most common blind rivet issues, why they happen, and what you can do to fix or prevent them.
Problem 1: Rivet Won’t Insert into the Hole
Cause:
- Hole too small
- Burrs or paint buildup
- Rivet body slightly oversized (manufacturing tolerance)
Fix:
- Verify hole size using a precision gauge
- Use a reamer or deburring tool to clear the hole
- Always clean the hole of paint, chips, or oxidation
Problem 2: Rivet Spins in the Hole Without Expanding
Cause:
- Hole too large
- Grip range mismatch (material stack too thin)
- Rivet pulled before seating fully
Fix:
- Measure actual material stack and switch to a shorter grip-range rivet
- Redrill with proper size or use larger diameter rivet
- Use flange-head rivets for better grip on soft materials
I once installed over 60 rivets into a powder-coated panel only to find 10 of them would spin freely—the holes were oversized due to paint.
Problem 3: Cracking or Deformation of the Base Material
Cause:
- No chamfering, sharp hole edges
- Rivet head too small (point-load pressure)
- Incorrect rivet type for the base material
Fix:
- Use peel-type or wide-flange rivets for fragile materials
- Apply a 0.5 mm chamfer on both sides
- Slow down rivet pull to prevent shock on thin materials
Problem 4: Mandrel Doesn’t Break Cleanly
Cause:
- Low-quality rivets
- Improper rivet gun settings
- Misalignment during pull
Fix:
- Replace worn-out gun jaws or adjust pulling force
- Ensure rivet is perpendicular to surface
- Avoid off-brand rivets without verified quality
I once had a batch of low-grade stainless rivets where 30% didn’t break off. We had to manually shear the stems—huge time loss.
Problem 5: Rivet Pulls Through the Material (aka “pull-through”)
Cause:
- Thin sheet metal + small rivet head
- Soft material or over-drilled hole
- Incorrect grip range
Fix:
- Use backing washers or wider flange heads
- Choose a peel-style rivet
- Always check grip range before loading the gun
Problem-Solution Summary Table
| Problem | Likely Cause | Recommended Fix |
|---|---|---|
| Rivet won’t insert | Hole too small / blocked | Ream, deburr, check specs |
| Rivet spins | Hole too large / grip mismatch | Resize hole or switch rivet |
| Cracking/deformation | Sharp edges / wrong rivet type | Chamfer holes, use wide flange or peel type |
| Mandrel won’t break | Low quality or misalignment | Check tool settings, use higher-grade rivets |
| Pull-through | Sheet too thin or head too small | Use washers, peel-style, or flange-head |
Chapter 7: Application Cases
To bring all this together, I’ll share some real-world use cases where blind rivets, combined with CNC-drilled holes, delivered excellent results—or where skipping best practices caused real issues.
Case 1: Outdoor Electrical Enclosure (Waterproof Panel)
Industry: Utilities & Infrastructure
Material: Powder-coated aluminum
Rivet: Closed-end, aluminum body, aluminum mandrel
CNC Setup: 4.1 mm holes drilled, deburred and lightly chamfered
Outcome:
- Rivets sealed the panel tightly
- Zero water ingress after 6 months in a rain-exposed field test
- Used pneumatic rivet guns for quick on-site installation
Lesson:
Closed-end rivets are critical where water or dust resistance is needed. Chamfering helped rivet heads sit perfectly flush.
Case 2: Automotive Door Panel Assembly
Industry: Aftermarket automotive
Material: 1.0 mm aluminum inner + 1.2 mm outer sheet
Rivet: Multi-grip aluminum rivets
Problem:
- Some joints were rattling after road use
- Cause: installer used 4.8 mm standard rivets with short grip
Solution:
- Switched to 4.8 mm multi-grip rivets with 3.0–6.0 mm range
- Re-drilled a few holes for better fit
- Added visual inspection step in process
Lesson:
You can’t guess grip range. Always measure the total thickness, especially with uneven or layered materials.
Case 3: Sheet Metal Kiosk Frame
Industry: Industrial display manufacturing
Material: 2 mm mild steel, powder-coated
Rivet: 6.4 mm steel rivets, large flange
Challenge:
- CNC drilling on a vacuum table with slight material shift
- Some rivets were off-center, damaging panel corners
Fix:
- Added fixture holes to lock position
- Slowed down CNC feed rate to reduce vibration
- Implemented QC check on drill pattern offsets
Lesson:
Even if the rivets are perfect, bad CNC alignment ruins the result. Tooling and fixturing matter just as much.
Chapter 8: Tooling & Equipment Guide
Choosing the right tooling can be the difference between a quick, flawless blind rivet installation and a long day of rework and frustration. I’ve used everything from budget rivet guns to high-end automated systems, and here’s what I’ve learned.
Rivet Guns
1. Manual Rivet Guns
- Cheap and portable
- Great for low-volume or mobile work
- Downside: tiresome with large rivets or repeated use
2. Pneumatic Rivet Guns
- Fast, consistent pull force
- Ideal for batch production
- Requires compressor and maintenance
3. Battery-Powered Riveters
- Cordless and ergonomic
- Strong enough for mid-sized aluminum rivets
- Heavier and slower than pneumatics, but highly mobile
| Tool Type | Use Case | Strengths |
|---|---|---|
| Manual | Field repairs, tight spaces | Simple, no power required |
| Pneumatic | Production lines, workshops | Fast, repeatable, efficient |
| Battery-powered | Construction sites, remote assembly | Cordless, powerful, versatile |
My personal favorite for shop work is a pneumatic unit with adjustable pull force—perfect for switching between rivet types without over-pulling.
CNC Drilling Tooling
- Split-point HSS drills: For aluminum and thin steel
- Carbide drills: For stainless and hard plastics
- Peck-drilling or step drilling: To prevent melting or blowout on composites
- Spot drills: Help with hole accuracy and burr reduction
Make sure you match drill size exactly to your rivet’s spec. Don’t assume the chart is universal—test first.
Chapter 9: Quick Reference Tables
Sometimes you just need fast numbers. Here are the tables I keep on my shop wall:
📏 Blind Rivet Drill Size Chart
| Rivet Body (mm) | Recommended Hole (mm) | Tolerance (± mm) |
|---|---|---|
| 2.4 mm | 2.5 mm | ±0.05 |
| 3.2 mm | 3.3 mm | ±0.05 |
| 4.0 mm | 4.1–4.2 mm | ±0.08 |
| 4.8 mm | 4.9–5.0 mm | ±0.10 |
| 6.4 mm | 6.5–6.6 mm | ±0.10 |
🔧 Material & Rivet Compatibility
| Material | Recommended Rivet | Avoid |
|---|---|---|
| Aluminum | Aluminum or coated steel | Bare stainless (wet env.) |
| Mild Steel | Steel rivets | Aluminum (corrosion risk) |
| Stainless Steel | Stainless rivets | None |
| Plastics/Composites | Peel-type / trifold | Standard steel rivets |
🧰 Grip Range Selection Guide
| Material Stack (mm) | Rivet Grip Range | Suggested Rivet Length |
|---|---|---|
| 1.5–3.0 mm | 1.0–3.5 mm | 6 mm |
| 3.0–6.0 mm | 3.0–6.5 mm | 10 mm |
| 5.0–8.0 mm | 5.0–9.0 mm | 12 mm |
Always match rivet length to the combined thickness of your materials—not just the visible layer.
FAQ
Here are 20 real-world questions I’ve gotten from engineers, installers, and students over the years—plus quick answers to keep you moving.
- What is a blind rivet?
A one-sided mechanical fastener that clamps materials when you can’t access the backside. - Why use blind rivets instead of welding or screws?
No backside access required, faster install, less deformation, and no threading needed. - Do I need a chamfer for every rivet hole?
Not always, but it helps with seating and appearance, especially for flush rivets. - How do I choose the right grip range?
Measure the total material stack, then select a rivet whose grip range includes that value. - What happens if the hole is too big?
The rivet may spin, underperform, or fall out. Resize or switch to a larger rivet. - Can blind rivets be used on plastic?
Yes, with peel-type or trifold rivets designed for soft materials. - Is it OK to use stainless rivets on aluminum?
Only if isolated with washers or coatings to prevent galvanic corrosion. - Can I drill rivet holes with a hand drill?
Yes, but CNC offers better accuracy and consistency. - How do I remove a blind rivet?
Drill out the center mandrel with a slightly smaller bit, then punch through the sleeve. - Are blind rivets waterproof?
Only closed-end rivets are sealed. Open-end rivets allow fluid intrusion. - What’s the difference between peel and multigrip rivets?
Peel rivets split open, while multigrip adapt to a range of thicknesses. - How long do blind rivets last?
Decades, if properly installed and matched to the environment and load. - Can blind rivets support structural loads?
Some can, but most are for shear loads. Check manufacturer specs. - Do I need special drill bits for different materials?
Yes. Use carbide for stainless and HSS for aluminum. - Should I use a rivet washer?
Yes, when working with soft materials or oversized holes. - Can I reuse a rivet hole?
Sometimes, if the hole isn’t deformed and the rivet fits snugly. - What’s the fastest way to install blind rivets in production?
Pneumatic rivet guns with preloaded magazines or auto-feeders. - Are there color-matched rivets for painted panels?
Yes, powder-coated and anodized rivets are available in various colors. - How do I ensure my rivets are tight enough?
Proper tool pressure, full mandrel break-off, and post-install inspection. - What if the rivet doesn’t break off cleanly?
Replace the tool or use higher-quality rivets. Don’t force it—mandrel jams can deform the joint.
Authoritative References
- Wikipedia – Rivet
- This comprehensive article covers various types of rivets, including blind rivets, their history, and installation methods. It provides a solid foundation for understanding the role of rivets in mechanical fastening.
- https://en.wikipedia.org/wiki/Rivet
- Wikipedia – Fastener
- Offers an overview of different fastening devices, their applications, and the materials used. This resource helps contextualize blind rivets within the broader category of fasteners.
- https://en.wikipedia.org/wiki/Fastener
- ScienceDirect – Quality Monitoring of Blind Fasteners Installation
- This research paper discusses methods for evaluating the quality of blind fastener installations, integrating the effects of prior drilling operations. It provides technical insights into ensuring reliable rivet joints.
- https://www.sciencedirect.com/science/article/pii/S2405896322002063科学直通车
- ScienceDirect – Mechanical Fastening
- An in-depth look at mechanical fastening techniques, including the use of rivets. This resource delves into the principles and practices of creating secure joints using various fasteners.
- https://www.sciencedirect.com/science/article/pii/B9780815515814500202科学直通车+3Wikipedia+3科学直通车+3
- ScienceDirect – Self-Piercing Rivet
- Explores the concept and application of self-piercing rivets, a type of blind rivet that doesn’t require pre-drilled holes. This article is valuable for understanding alternative riveting methods.
- https://www.sciencedirect.com/topics/engineering/self-piercing-rivet
- Wikipedia – Joining Technology
- Provides an overview of various joining methods, including mechanical fastening, welding, and adhesive bonding. This article helps place blind riveting within the spectrum of joining technologies.
- https://en.wikipedia.org/wiki/Joining_technology
Other Articles You Might Enjoy
- Metal Rivets and CNC Machining: From Hole Design to Final Assembly
I. Introduction Metal rivets have been around for centuries. Even in today's high-tech, precision-engineered world, they're still everywhere. From aircraft skins to laptop chassis, metal rivets provide a reliable, permanent…
- Plastic Rivets Prototyping and Production machining: A Modern Solution for Complex Fasteners
Understanding Plastic Rivets: Types, Uses, and Materials Plastic rivets are versatile fasteners used to join materials in various applications. Unlike metal rivets, plastic rivets are lightweight, corrosion-resistant, and non-conductive, making…
- Riveting Quality Starts with Precision: Why CNC Machining Matters
Introduction Riveting is one of those processes people often take for granted. I’ve seen it used in aircraft panels, metal furniture, elevator enclosures, HVAC ducting, and even on high-end kitchen…
- Custom Rivet Nut Manufacturing: Materials, Design & CNC Machining Explained
Chapter 1: Overview of Rivet Nuts I remember the first time I encountered a rivet nut. I was puzzled by its appearance and curious about how something so small could…
- Mastering CNC Drilling: Creating Exact Fits for Pull Through Rivets
CNC machining has become an essential part of modern manufacturing, offering unmatched precision and efficiency. One of the most critical aspects of CNC machining is drilling, particularly when creating holes…
- Types of Rivets: A Comprehensive Guide
Introduction: The Critical Role of Rivets in Multiple Industries Rivets are permanent mechanical fasteners that are critical in the assembly of everything from simple structures to complex machinery across numerous…
- Mastering CNC Drills for Precision in Composite Materials
CNC drilling is a critical process in modern manufacturing, particularly when working with composite materials. As industries like aerospace, automotive, and renewable energy continue to demand lightweight, high-strength components, achieving…
- CNC Machined Parts Unveiled: Mastering Ceramic Drilling with Precision Tools
When it comes to CNC machining, drilling ceramic materials presents a unique set of challenges. Ceramics are hard, brittle, and require specialized techniques to achieve precision without compromising the material's…
- Mastering Hole Patterns in CNC Machined Parts
When it comes to point-to-point cnc machining operations like cnc drilling, reaming, tapping, and boring, using the same tool for single or multiple holes is common practice. In fact, multi-hole…