The Power of Anodizing Aluminum in CNC Machining
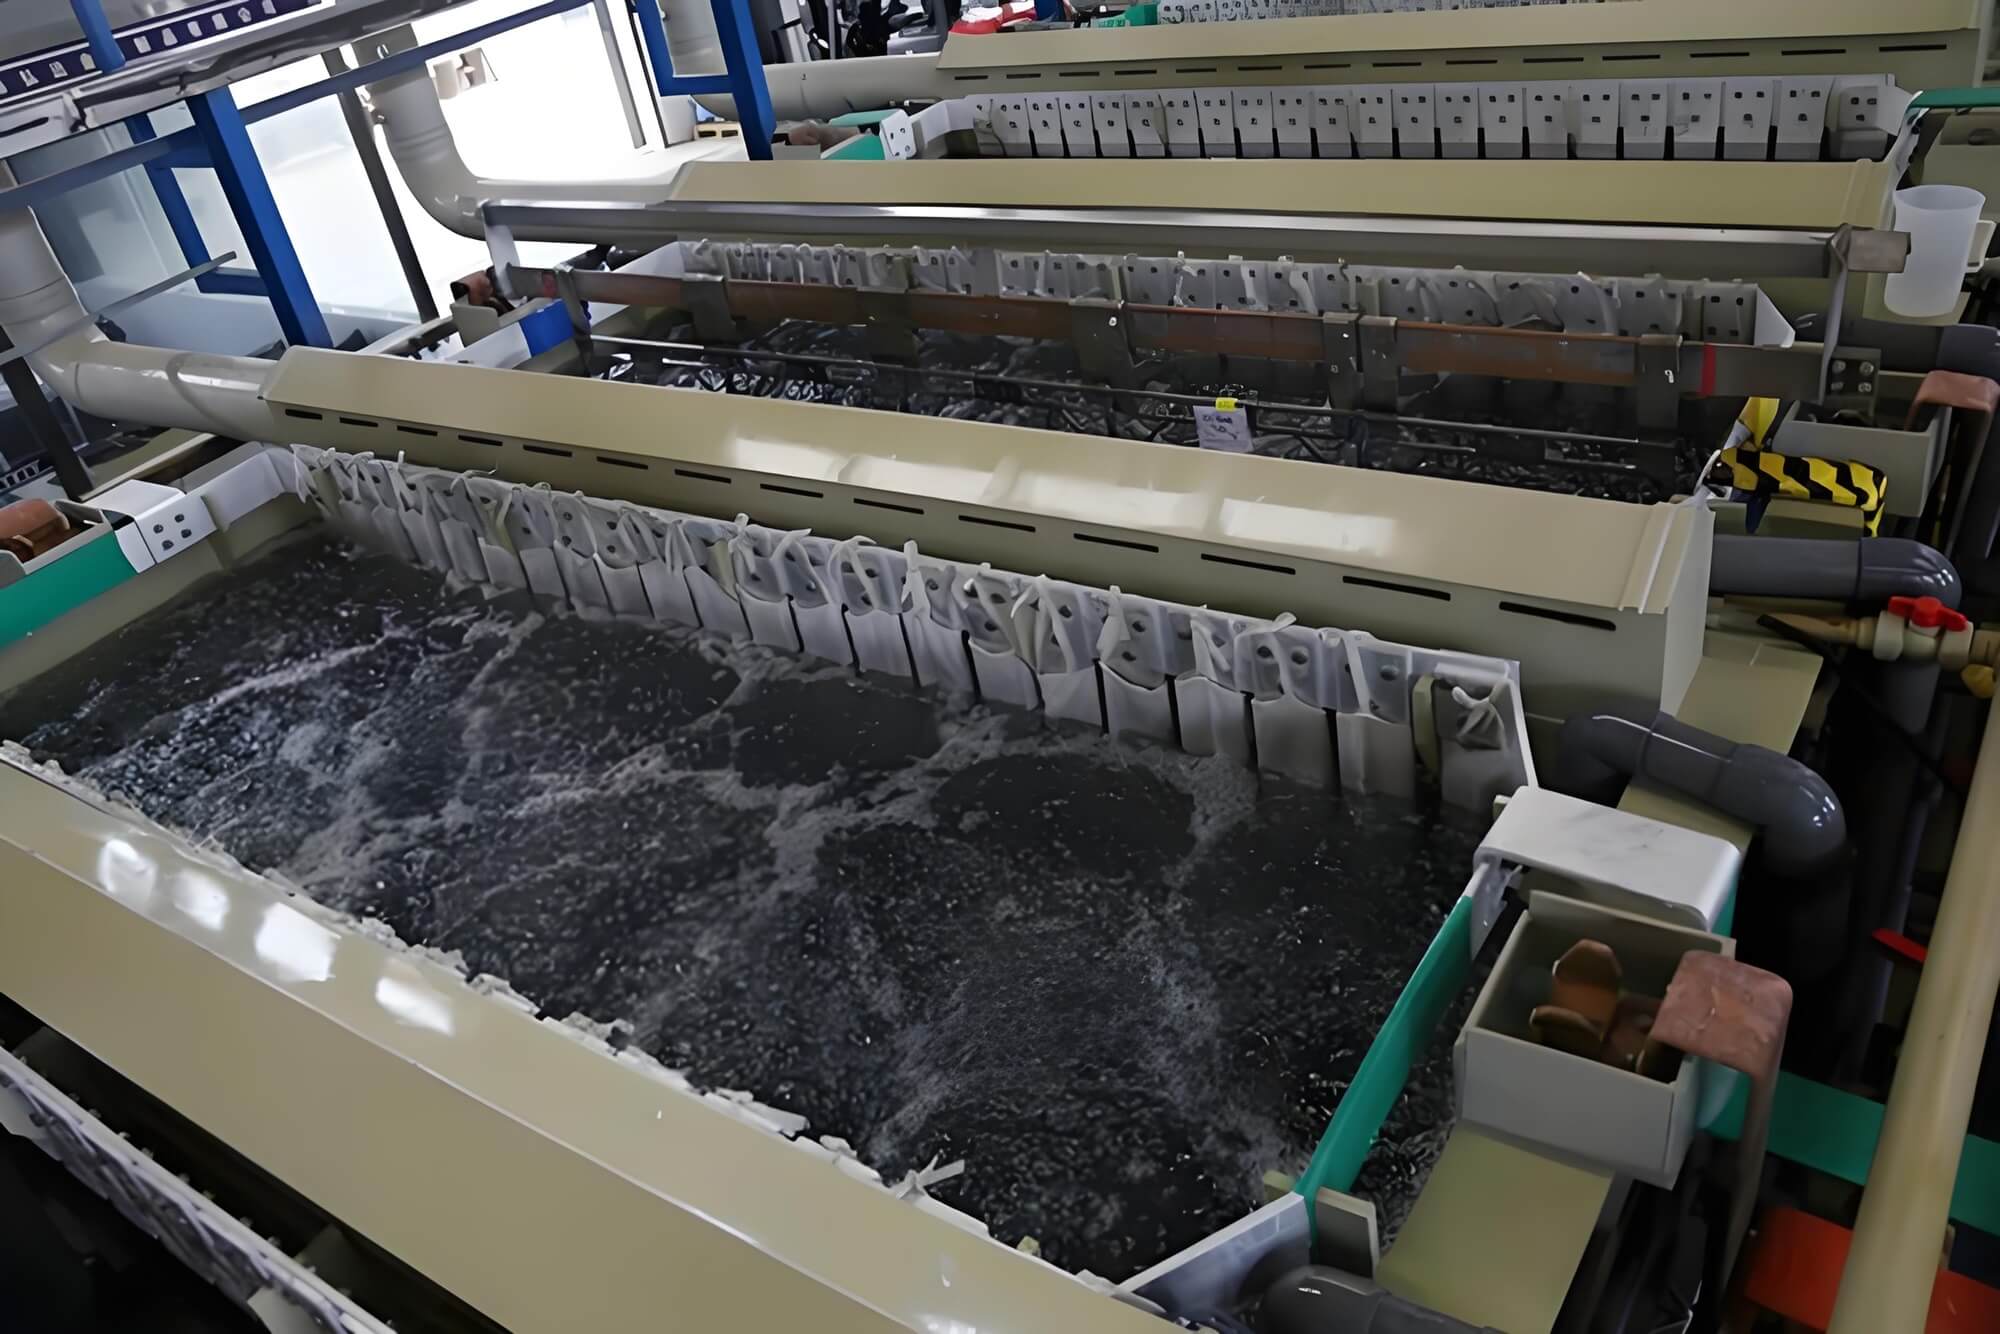
Anodizing is an electrochemical process that transforms aluminum into a durable, corrosion-resistant surface with a vibrant, professional finish. As someone who’s spent countless hours in my workshop perfecting how to anodize aluminum, I can attest that this process is a game-changer for DIY enthusiasts and CNC machining hobbyists alike. Unlike paint, the anodic oxide layer bonds seamlessly with the aluminum, ensuring it won’t chip or peel. By suspending the aluminum part as the anode in a sulfuric acid bath and applying a direct current, you create a porous oxide layer that’s perfect for dyeing and sealing.
When I first explored how to anodize aluminum for parts crafted on my CNC machine, I was amazed by the durability and aesthetic possibilities. The process enhances corrosion resistance, provides electrical insulation, and creates a surface that’s ideal for bonding paints or adhesives. This guide focuses on Type II (Sulfuric Acid Anodizing), a DIY-friendly method that delivers a robust coating for CNC machining projects, from custom brackets to decorative panels. Whether you’re anodizing a precision-milled component or a simple aluminum plate, mastering how to anodize aluminum elevates your work to a professional level.
Building Your Anodizing Workshop for CNC Machining
2.1 Prioritizing Safety in How to Anodize Aluminum
Safety is non-negotiable when learning how to anodize aluminum, especially when handling parts fresh from CNC machining. The process involves corrosive chemicals and electricity, so I always suit up with chemical-resistant gloves, splash-proof goggles, and a respirator. My workshop is well-ventilated, with a box of baking soda on hand to neutralize acid spills instantly. One lesson I learned the hard way: always add acid to water, not the reverse, to avoid a dangerous reaction. Early on, I nearly caused a spill by rushing this step—slow and steady is the way to go. Neutralize all chemical waste and check local regulations for safe disposal to keep your CNC machining and anodizing setup environmentally responsible.
2.2 Essential Tools for Anodizing Aluminum and CNC Machining
When I started anodizing parts I’d milled on my CNC machine, I realized the importance of a reliable toolkit. Titanium wire is my go-to for racking parts, as it’s reusable and ensures a solid electrical connection—crucial for consistent results in how to anodize aluminum. Here’s the toolkit I’ve refined over years of trial and error:
| Item | Category | Specification & Purpose |
| Sulfuric Acid | Chemicals | Battery Acid (30-35% H₂SO₄). The electrolyte for the anodizing bath in how to anodize aluminum . |
| Distilled Water | Chemicals | For mixing solutions and rinsing to prevent contamination from tap water minerals. |
| Degreaser | Chemicals | Non-petroleum cleaner (e.g., Simple Green). Prepares CNC machining parts for anodizing. |
| Lye (NaOH) | Chemicals | Sodium Hydroxide (drain cleaner). Etches aluminum to remove oxides before anodizing. |
| Baking Soda | Chemicals | Sodium Bicarbonate. Neutralizes acid spills and waste for safe disposal. |
| Anodizing Dye | Chemicals | Specialized dyes for vibrant colors. Fabric dyes (e.g., RIT) work for budget CNC machining projects. |
| Plastic Containers | Hardware | 3+ non-conductive tubs (e.g., 5-gallon buckets). For etching, anodizing, rinsing, and dyeing. |
| Cathode Material | Hardware | Lead sheet or 6063-alloy aluminum plate. Acts as the negative electrode in the bath. |
| Racking Wire | Hardware | Titanium wire (preferred) for reusable racking. Aluminum wire works but is single-use. |
| DC Power Supply | Hardware | Variable 30V, 5A+ supply. A car battery charger suffices for small CNC machining parts. |
| Old Pot | Hardware | Stainless steel or enamel pot for heating dye baths. Never reuse for food. |
| Hot Plate | Hardware | Heats dye and sealing baths for how to anodize aluminum . |
| PPE | Safety | Goggles, gloves, respirator, apron. Protects during CNC machining and anodizing. |
Export to Google Sheets: I track my supplies in a spreadsheet to stay organized, especially when juggling multiple CNC machining and anodizing projects.
Step-by-Step Guide to How to Anodize Aluminum
Step 1: Preparing CNC-Machined Aluminum Parts
Surface preparation is critical when learning how to anodize aluminum, especially for CNC machining parts with intricate geometries. I start by sanding or scrubbing the part to achieve a uniform texture, often using a fine abrasive pad for consistency. Wearing gloves to avoid oils from my hands, I degrease the part with a non-petroleum cleaner like dish soap. For complex CNC machining parts, I etch them in a lye solution (3-4 tbsp per gallon of distilled water) for 3-5 minutes to strip the natural oxide layer. Rinsing with distilled water until the surface is water-break-free (no beading) is a trick I learned to ensure a flawless anodized finish.
Step 2: Setting Up the Anodizing Bath
To begin how to anodize aluminum, I set up two lead or aluminum cathodes in a plastic tank, connected by a wire. I rack my CNC machining part with titanium wire, ensuring it’s suspended without touching the cathodes. Mixing the electrolyte is a delicate step: I slowly add battery acid to distilled water (1:1 ratio), never the other way around. One time, I rushed this and nearly overheated the solution—patience is key in how to anodize aluminum safely.
Step 3: The Aluminum Anodizing Process
I connect the positive (+) lead of my DC power supply to the part and the negative (-) lead to the cathodes. For predictable results in how to anodize aluminum, I rely on the 720 Rule: Time (minutes) = (720 × Desired Thickness in mils) / Current Density (Amps/Sq.Ft.). I target 12 amps per square foot (ASF) and keep the bath at 68-72°F (20-22°C). For larger CNC machining parts, I use an ice bath to manage heat, a tip I picked up after a powdery finish ruined an early project.
| Desired Finish | Target Thickness (mils) | Anodizing Time at 12 ASF (minutes) |
| Light Dye / Decorative | 0.4 | 24 |
| Standard Dye / Good Protection | 0.7 | 42 |
| Deep Black / Maximum Durability | 1.0 | 60 |
Export to Google Sheets: I log my anodizing settings to replicate successful finishes for CNC machining projects.
Step 4: Rinsing, Dyeing, and Sealing
After anodizing, I turn off the power and rinse the part in distilled water. A 5-minute dip in a baking soda solution neutralizes residual acid, followed by another rinse. For coloring, I immerse the part in a dye bath heated to 120-140°F (50-60°C) for 5-15 minutes. I once overheated the dye, resulting in poor color uptake—now I monitor the temperature closely. After rinsing with cool distilled water, I seal the part in boiling distilled water for 30 minutes to lock in the color and enhance corrosion resistance, a must for CNC machining parts exposed to harsh environments. I let the part air cool to avoid thermal shock.
Troubleshooting How to Anodize Aluminum for CNC Machining
Defects can frustrate even seasoned anodizers. If a flaw appears, I strip the coating with lye. If it persists, the issue is in surface preparation—common with CNC machining parts with tool marks. If the flaw disappears, the problem lies in later steps. Here’s my troubleshooting guide:
| Defect | Likely Cause(s) | Recommended Solution(s) |
| Anodizing Burn | Excessive current; Loose racking. | Lower current; Tighten titanium wire connections. |
| Powdery Finish | Bath too warm (>75°F / 24°C). | Cool bath with ice; Monitor temperature closely. |
| Uneven Color | Poor cleaning; Inadequate rinsing. | Degrease thoroughly; Rinse until water-break-free. |
| No/Poor Dye Uptake | Bad electrical connection; Overheated dye. | Check wiring; Keep dye bath below 140°F (60°C). |
| Pitting | Tap water or steel contamination. | Use distilled water; Avoid steel tools in CNC machining . |
How to Anodize Aluminum vs. Other Finishes for CNC Machining
Anodizing stands out for CNC machining parts because it integrates the finish into the aluminum, unlike additive coatings like paint or powder coating. I’ve powder-coated some CNC machining parts, but anodizing’s durability and scratch resistance make it my go-to for high-wear components.
| Attribute | Anodizing | Powder Coating | Liquid Paint |
| Durability / Hardness | Outstanding. Resists scratches on CNC machining parts. | Good. Tough but less hard than anodizing. | Fair. Prone to abrasion. |
| Adhesion | Integral. Won’t peel or flake. | Strong mechanical bond. | Susceptible to chipping. |
| Corrosion Resistance | Superior. Ideal for outdoor CNC machining parts. | Very good until scratched. | Good but fails at scratches. |
| Color & Finish Options | Vibrant, translucent metallic look. | Unlimited opaque colors and textures. | Widest color range. |
| UV Resistance | Excellent. No fading on CNC machining parts. | Very good with modern powders. | Varies by paint type. |
| Cost | Moderate to high for DIY setups. | Cost-effective for large batches. | Low to high, depending on quality. |
| Environmental Impact | Low. No VOCs; recyclable. | Minimal VOCs; eco-friendly. | High VOCs in solvent-based paints. |
Personal Insights and Tips for How to Anodize Aluminum
After years of combining CNC machining and anodizing, I’ve learned that success comes down to three things: obsessive cleanliness, precise control, and patience. One of my proudest projects was anodizing a CNC machining-milled aluminum enclosure in deep black—it took three tries to perfect the surface prep, but the result was stunning. My top tip: invest in a reliable DC power supply; a cheap battery charger caused inconsistent results in my early attempts. Also, keep a notebook or Google Sheet to track your settings—it’s a lifesaver for replicating finishes on CNC machining parts.
Anodizing isn’t just a process; it’s a craft that elevates your CNC machining projects to professional quality. Whether you’re creating functional components or decorative pieces, mastering how to anodize aluminum unlocks endless possibilities. Try it, experiment with colors, and share your results in the comments—I’d love to hear about your CNC machining and anodizing adventures!
FAQ:
1. What is the easiest way to start learning how to anodize aluminum at home?
Starting with how to anodize aluminum is simpler than it seems, but it requires careful setup. In my experience, begin with small, simple CNC machining parts, like a flat aluminum plate, to practice the process. Use a basic kit with battery acid, distilled water, and a car battery charger as a power supply. Follow the Type II anodizing steps outlined in the guide—clean thoroughly, maintain a consistent 12 ASF current, and seal properly. My first project was a small CNC machining keychain, and keeping it simple helped me master the basics without overwhelming myself.
2. Can I anodize aluminum parts made from any CNC machining process?
Yes, most aluminum alloys from CNC machining can be anodized, but alloys like 6061 or 7075 work best for Type II anodizing due to their composition. I’ve anodized CNC machining parts from both milling and turning, and the key is ensuring the surface is free of tool marks or contaminants. If your CNC machining leaves rough surfaces, sand them to a uniform finish before anodizing. Once, I tried anodizing a poorly finished part, and the imperfections were glaring—surface prep is everything!
3. How do I choose the right dye for anodizing aluminum?
Selecting a dye for how to anodize aluminum depends on your project’s goals. Specialized anodizing dyes offer the most vibrant, consistent colors, but I’ve had decent results with budget-friendly fabric dyes like RIT for CNC machining prototypes. For professional-grade CNC machining parts, I recommend investing in dyes formulated for anodizing, as they penetrate the porous oxide layer better. Always test on a scrap piece first—I learned this after a dye batch turned out patchy on a custom CNC machining bracket.
4. Why did my anodized CNC machining part come out uneven or blotchy?
Uneven finishes in how to anodize aluminum often stem from poor surface preparation or inconsistent rinsing. In my workshop, I’ve seen blotchy results when I skipped thorough degreasing or used tap water, which can leave chloride residues. Ensure your CNC machining part is water-break-free after rinsing (no water beads). Also, check your electrical connections—loose titanium wire caused uneven anodizing on one of my early projects. Refer to the troubleshooting table in the guide for specific fixes.
5. How does anodizing compare to painting for CNC machining parts?
Anodizing outperforms painting for CNC machining parts in durability and adhesion because it’s integral to the aluminum, not a surface coating. I’ve painted CNC machining parts before, but scratches exposed the bare metal. Anodized finishes, like those on my CNC machining enclosures, resist scratches and don’t peel. However, painting offers more color variety. For outdoor CNC machining components, I prefer anodizing for its corrosion resistance and UV stability—check the comparison table in the article for details.
6. Can I reuse my anodizing setup for multiple CNC machining projects?
Absolutely, and this is one of my favorite parts of how to anodize aluminum! The electrolyte (sulfuric acid solution) and titanium racking wire can be reused for multiple CNC machining projects if stored properly. I keep my electrolyte in a sealed plastic container and filter it between uses to remove debris. Cathodes and plastic tubs are also reusable, making the setup cost-effective over time. Just replace dyes as needed and ensure your power supply is reliable for consistent how to anodize aluminum results.
Reference:
https://en.wikipedia.org/wiki/Anodizing;
https://en.wikipedia.org/wiki/Photosensitive_anodized_aluminum;
https://en.wikipedia.org/wiki/Anodic_aluminium_oxide;
https://www.youtube.com/watch?v=0yl35W0o9S0;
Other Articles You Might Enjoy
- Thinking of Using Satin Anodized Aluminum for CNC Parts
What Exactly Is Satin Anodized Aluminum, and Why Might You Choose It? I’ve worked with aluminum in a lot of projects—some industrial, some purely cosmetic. Over time, I’ve come to…
- Clear Anodized Aluminum Explained: Material Benefits, Use Cases and Buying Tips
Introduction When I first came across clear anodized aluminum, I was designing a custom electronics enclosure for a client in the industrial automation field. They wanted something lightweight, durable, and…
- The Ultimate Guide to Anodized Aluminum Machining: Properties, Processes, and Applications
Chapter 1: Introduction to Anodized Aluminum Anodized aluminum is not just aluminum with a colorful finish. It is aluminum that has been treated through an electrochemical process to form a…
- Why Choose Hard Anodized Aluminum for CNC Machined Parts?
Why Hard Anodized Aluminum and CNC Machining Are Your Best Choice If you're a customer seeking high-performance, durable, and precision-engineered parts, this article is tailored to your needs. Hard anodized…
- The Role of Surface Finishes in CNC Machining: Anodized Aluminum vs. Stainless Steel
The Role of Surface Finishes in CNC Machining: Anodized Aluminum vs. Stainless Steel CNC machining, standing for Computer Numerical Control, represents a prevalent technology used in the manufacturing sector where…


