What Exactly Is Satin Anodized Aluminum, and Why Might You Choose It?
I’ve worked with aluminum in a lot of projects—some industrial, some purely cosmetic. Over time, I’ve come to appreciate just how versatile this material really is. But one finish that continues to stand out for me—both in appearance and performance—is satin anodized aluminum.
So what exactly is satin anodized aluminum?
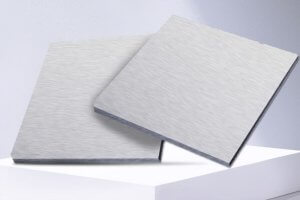
At its core, satin anodized aluminum is just what it sounds like: aluminum that’s been anodized (a process that thickens and strengthens the natural oxide layer on its surface), with a satin finish that gives it a soft, smooth, non-reflective sheen. It’s not glossy like polished aluminum, and it doesn’t have the heavy texture of brushed aluminum. Instead, it strikes a balance—subtle, refined, and surprisingly durable.
From a CNC machining perspective, satin anodized aluminum offers a surface finish that’s not only aesthetically pleasing but also functional. I’ve used it in projects ranging from custom enclosures for electronics to lightweight structural components that needed corrosion resistance without sacrificing the visual quality.
🌟 Key Characteristics of Satin Anodized Aluminum
| Property | Description |
|---|---|
| Finish | Soft, matte, low-gloss surface with even texture |
| Corrosion Resistance | High, due to the thickened anodic oxide layer |
| Wear Resistance | Moderate to high, depending on anodizing thickness |
| Color Stability | Excellent; color stays stable under UV and heat (if dyed during anodizing) |
| Fingerprints & Smudging | Less visible than on polished or glossy finishes |
| Post-CNC Machining Handling | Typically anodized after machining, but some variations apply |
Why It Matters in CNC Projects
If you’re thinking about using satin anodized aluminum for CNC parts, you probably care about more than just the raw functionality. You want your final product to look good and last long.
In my case, I used satin anodized aluminum in a batch of high-end audio gear housings. The clients didn’t just want clean internal layouts—they wanted their product to feel premium in-hand. Polished aluminum was too flashy, and raw aluminum oxidized too fast. Satin anodized aluminum was the Goldilocks choice: tough, clean, elegant.
Here’s why more engineers and designers I know are choosing satin anodized aluminum:
- It doesn’t scream for attention like glossy finishes—but still looks premium.
- It’s fingerprint-resistant, which makes it a smart choice for consumer-facing parts.
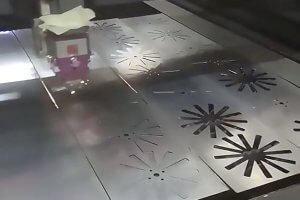
- It plays well with laser etching, engraving, or secondary finishes.
- It’s chemically stable, so you can count on long-term durability.
Technical Comparison with Other Finishes
| Finish Type | Surface Gloss | Scratch Resistance | CNC Friendly? | Visual Appeal | Cost Level |
|---|---|---|---|---|---|
| Satin Anodized | Low-Mid | High | ✅ Yes | ★★★★☆ | $$ |
| Brushed Aluminum | Mid | Medium | ✅ Yes | ★★★☆☆ | $ |
| Polished Anodized | High | Low | ❌ Prone to damage | ★★★★☆ | $$-$$$ |
| Raw Machined Aluminum | Low | Low (oxidizes fast) | ✅ Yes | ★★☆☆☆ | $ |
| Powder-Coated Aluminum | Varies | Very High | ⚠ May interfere | ★★★☆☆ | $$$ |
A Personal Take
The first time I handled satin anodized aluminum was on a prototype drone housing we were testing. After machining, we had the pieces sent out for satin anodizing. When the parts came back, I was surprised by how different they felt in-hand—cool, smooth, but not slippery. More importantly, they looked like they belonged in a professional product, not a prototype.
That’s when I started using it more. Today, I often recommend satin anodized aluminum when clients want something between a technical feel and a luxury touch.
Common Applications of Satin Anodized Aluminum
In my years working with CNC machining, I’ve seen satin anodized aluminum show up in a wide range of industries. It’s one of those finishes that quietly gets the job done while elevating the overall look and durability of a part. Whether you’re prototyping or producing at scale, it’s a favorite material when both form and function matter.
Here are the key areas where I’ve either personally used or seen satin anodized aluminum being used effectively in CNC projects.
📱 Consumer Electronics
This is hands-down one of the most visible applications. If you’ve ever held a high-end smartphone, laptop, or tablet, there’s a good chance the casing was made of satin anodized aluminum. CNC machining gives manufacturers the ability to create precision housings, speaker grills, ports, and even keyboard frames.
One time, I worked with a startup designing a rugged, minimalist smartwatch. The client insisted on something that felt sleek but also durable enough to resist wear from daily use. Satin anodized aluminum checked every box—resisting scratches better than polished finishes and giving us a consistent, non-reflective look that matched the brand’s style.
🚗 Automotive Interiors and Trim
In automotive design, aesthetics are just as important as function—especially in luxury interiors. Satin anodized aluminum is often used for:
- Dashboard trim
- Door handles
- Gear shift panels
- Vent bezels
What makes it ideal here is the tactile quality. You get a metal part that feels cool and smooth to the touch, with just the right amount of grip. It resists fingerprint smudges better than brushed aluminum and is less prone to visible scratches than polished surfaces.
✈️ Aerospace and Drones
In aerospace, weight and durability are critical. I’ve seen satin anodized aluminum used for:
- Structural brackets
- Lightweight drone frames
- Mounting hardware
- Instrument panels
The anodizing process not only protects the part from oxidation but also keeps weight to a minimum. One of our clients used satin anodized aluminum for a UAV frame—they liked how it looked, sure, but what really sold them was the corrosion resistance in humid environments and the ease of machining prior to anodizing.
🏢 Architecture and Industrial Design
In architecture and furniture hardware, satin anodized aluminum plays a role in both exterior and interior applications. Think:
- Wall panel trims
- Door pulls and handles
- Custom signage
- Decorative frames
These parts often go through CNC milling first, then anodizing. I’ve even seen architects use CNC-cut aluminum in custom stair railings and decorative panels where uniform appearance, scratch resistance, and corrosion protectionwere key.
🛠️ B2B and Industrial Equipment
While not as glamorous, industrial gear like machine enclosures, heat sinks, sensor housings, and fixtures are also often made from satin anodized aluminum. For instance, I once helped design a sensor mount that was deployed in a wet factory environment. The combination of CNC precision and satin anodized aluminum’s corrosion resistance made it ideal.
📊 Table: Common CNC Applications of Satin Anodized Aluminum
| Industry | CNC Components Made from Satin Anodized Aluminum | Reasons for Use |
|---|---|---|
| Consumer Electronics | Phone/laptop casings, speaker grills, ports | Aesthetic, fingerprint resistance, scratch-proof |
| Automotive | Trim panels, knobs, bezels | Tactile quality, wear resistance, visual appeal |
| Aerospace | Frames, brackets, mounts | Lightweight, corrosion-resistant, CNC-compatible |
| Architecture | Trim, railings, custom fixtures | Uniform matte look, weather-resistance |
| Industrial Equipment | Sensor housings, heat sinks, panels | Durable, thermally stable, corrosion protection |
Personally, I think one of the best parts about satin anodized aluminum is its versatility across mass production and low-volume prototyping. Whether you’re making 10 parts or 10,000, CNC machining keeps tolerances tight, and anodizing brings the finish to life.
Is Satin Anodized Aluminum Compatible with CNC Machining?
Before diving into a project, one of the first questions I usually get from clients is: “Can we machine this beforeanodizing? Or do we need to do it after?”
When it comes to satin anodized aluminum, CNC machining is not only compatible—it’s practically built for it. But there are technical things to understand if you want the results to look professional.
✅ Compatibility Overview
Satin anodized aluminum is typically CNC machined first, then anodized afterward. That’s because anodizing creates a surface layer that could be damaged if you machine it afterward—especially with intricate features.
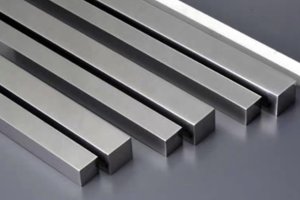
The most common aluminum alloys used in CNC machining and anodizing are:
- 6061-T6 — strong, corrosion-resistant, highly machinable
- 5052 — better corrosion resistance, but not as rigid
- 7075 — high strength, used in aerospace, but less ideal for cosmetic anodizing
🔧 CNC Before or After Anodizing?
| Process Order | Description |
|---|---|
| CNC Before Anodizing | ✅ Most common; machining is clean, and then anodizing gives the final finish |
| CNC After Anodizing | ⚠ Risky; may damage the anodized layer, unless re-anodized afterward |
| Partial CNC + Masking | ✅ Useful for selective finishing; mask certain areas before anodizing |
Tooling & Process Notes
If you’re planning to machine parts for anodizing, here are a few tips I’ve picked up from experience:
- Use sharp, polished tools – This reduces micro-tearing on the surface, which can show up after anodizing.
- Avoid coolant contamination – Residual oil can interfere with anodizing adhesion. Always clean thoroughly.
- Mind your chamfers – Anodizing can build up thickness unevenly around sharp edges; go with slightly larger radii.
- Leave allowance for layer buildup – Depending on your anodizing spec, the layer can add 0.0002″–0.001” per surface.
✍️ Firsthand Experience
I once had a batch of custom keyboard plates made from 6061 aluminum. We machined everything perfectly—tight tolerances, beautifully milled corners. Then we sent them out for satin anodizing. When they came back, the screw holes were slightly undersized because the anodizing layer had built up inside. Lesson learned: always factor in the anodizing layer if tolerances are tight.
📈 Table: Satin Anodized Aluminum and CNC Machining Compatibility Checklist
| Consideration | Recommendation | Why It Matters |
|---|---|---|
| Machining Order | Machine before anodizing | Preserves finish quality |
| Material Selection | 6061-T6 is ideal | Machinability + finish quality |
| Surface Prep | Clean parts thoroughly | Ensures consistent anodizing |
| Toolpath Strategy | Reduce sharp edges | Prevents uneven anodizing buildup |
| Hole Tolerance | Oversize slightly | Anodizing adds thickness |
In summary, CNC machining and satin anodized aluminum are a perfect pair—as long as you plan your process correctly. I’ve learned that even small oversights (like not accounting for that layer of anodizing in tight parts) can turn into major headaches later on. But when you get it right? The results speak for themselves.
When and Why to Choose Satin Anodized Aluminum?
I’ve come to realize that choosing a material isn’t just about technical specs—it’s about understanding how that material fits into the bigger picture of design, usability, and long-term performance. So when is satin anodized aluminum actually the right choice? And when might you want to consider alternatives?
Let’s break that down.
✳️ The Ideal Situations for Using Satin Anodized Aluminum
If your project checks off a few of these boxes, satin anodized aluminum might be the perfect match:
- You need a durable, corrosion-resistant finish
- Your CNC part will be visible to the end user
- Aesthetics matter (premium, uniform, non-glossy look)
- Your part will be touched frequently (fingerprint resistance is a plus)
- You want something that looks refined but not flashy
I worked on a client’s retail POS (point-of-sale) enclosure where those boxes were all checked. They wanted the unit to look sleek in a high-end retail store, but it also needed to survive repeated handling. Satin anodized aluminum gave them the look of brushed stainless with none of the fingerprint issues.
🧩 Design Benefits of Satin Anodized Aluminum
| Feature | Why It Helps in Design |
|---|---|
| Matte Finish | Reduces glare, ideal for user-facing panels |
| Consistent Coloration | Great for parts that need to match across batches |
| Scratch Resistance | Holds up better over time than polished aluminum |
| Color Dyes (Optional) | Can be dyed during anodizing process for branding or visual appeal |
| Lightweight Yet Strong | Ideal for handheld or portable applications |
⚖️ Satin vs Other Aluminum Finishes – A Decision Table
| Criteria | Satin Anodized Aluminum | Brushed Aluminum | Raw Aluminum | Powder Coated |
|---|---|---|---|---|
| Surface Durability | High | Medium | Low | Very High |
| Visual Uniformity | Excellent | Medium | Poor | High |
| Color Options | Medium (via dye) | Limited | None | Extensive |
| Re-anodizing Compatibility | Yes | Yes | Yes | No |
| Tactile Feel | Smooth | Textured | Raw | Plastic-like |
| CNC Suitability | Excellent | Excellent | Excellent | May require masking |
🚩 When Not to Use Satin Anodized Aluminum
Even though I personally love this finish, it’s not always the right tool for the job. You might want to explore other options if:
- The part will face heavy physical abuse (e.g., tool housings in industrial environments)
- You need very bold or textured colors (powder coating may suit better)
- You’re working on tight-turnaround prototyping and don’t have time for post-processing
In one rapid prototyping sprint, we had to skip anodizing entirely because of lead time. The raw CNC parts worked for functional testing, and we only added satin anodizing in the final production batch.
📌 Final Thoughts
In my experience, satin anodized aluminum is often the best “middle ground” for design: subtle but professional, functional but visually sharp. It’s the finish I default to when I want something that “just works” in both form and function.
If you’re in that zone where design needs to impress—but also survive everyday use—this finish is hard to beat.
Tips, Tools, and Techniques for CNC Machining Satin Anodized Aluminum
The real magic happens not just in choosing the right material—but in knowing how to work with it. I’ve made a fair share of mistakes when machining satin anodized aluminum, and I’ve also learned some tricks that saved time, money, and frustration.
This chapter is for anyone planning to actually machine the parts, whether you’re in-house or outsourcing the job. Let’s go deeper into the CNC side of the story.
🧰 Essential CNC Tools for Satin Anodized Aluminum
One of the biggest misconceptions is that aluminum is easy to cut. It is—but only if you treat it right.
Here’s a basic setup I’ve had good luck with when machining aluminum that will be anodized:
| Tool Type | Recommendation | Notes |
|---|---|---|
| End Mill | 2- or 3-flute, uncoated carbide | Sharp edge, good chip evacuation |
| Coating | ZrN (zirconium nitride) or TiB2 | Reduces built-up edge and galling |
| Coolant | Flood or mist with aluminum-specific fluid | Avoid oily residue before anodizing |
| Chamfer Tool | Small angle (30–45°) | Prevents stress risers and improves anodizing edges |
| Drill Bits | Sharp HSS or carbide | Use peck drilling for deeper holes |
⚙️ Best Practices During Machining
I learned this the hard way—bad machining = bad anodizing. The quality of your surface before anodizing directly affects the final look.
Here’s what I follow now as my standard checklist:
- Finish Passes Matter: Leave enough material for a light finish pass. This improves surface uniformity.
- Deburring is Critical: Use soft deburring to avoid damaging edges—aggressive methods can cause inconsistent dye absorption.
- Clean Before Anodizing: Use ultrasonic cleaning or IPA wipe-down. Don’t let cutting fluid or fingerprints interfere.
- Avoid Tool Marks: Especially on visible surfaces—those will really pop post-anodizing.
📉 Common Pitfalls (and How to Avoid Them)
| Problem | Cause | Fix |
|---|---|---|
| Uneven color after anodizing | Surface contamination or uneven cutting | Clean thoroughly and ensure finish passes |
| White spots or blotching | Coolant/oil not removed | Wash with deionized water or alcohol |
| Thread galling during assembly | No lubrication + tight anodized tolerances | Use anti-seize, lubricants, or helicoils |
| Warping of thin parts | Aggressive fixturing or finish passes | Use stress-relieving toolpaths |
| Color mismatch across batches | Inconsistent pre-anodizing prep | Batch clean parts and maintain repeatable machining |
✍️ Field Experience
On a past project, we had an order of enclosure lids CNC’d in a shop that used aggressive tooling and skipped final deburring. The parts looked fine until they came back from anodizing. That’s when we noticed the issue—half the lids had uneven coloring near the edges. We had to scrap 30% of the batch.
Since then, I always insist on a final polish and solvent wipe-down before anodizing. It takes an extra 10 minutes but can save the whole production run.
🧪 Table: Machining & Finishing Optimization for Satin Anodized Aluminum
| Step | What to Do | Impact on Final Part |
|---|---|---|
| Material Selection | Use 6061-T6 (or 7075 for strength) | Smooth surface + consistent anodizing |
| Cutting Strategy | Finish pass with minimal chip load | Reduces tool marks, gives smoother finish |
| Edge Treatment | Slight chamfers or radii | Prevents burn-through during anodizing |
| Surface Prep | Use isopropyl alcohol before anodizing | Removes oils that cause discoloration |
| Batch Consistency | Machine and anodize in grouped batches | Keeps colors and finishes consistent |
I’ve found that once you get your machining workflow dialed in, satin anodized aluminum becomes one of the most rewarding materials to work with. It’s like unlocking a cheat code: strong, great-looking parts that can be produced consistently—and leave a great impression.
Common Issues When CNC Machining Satin Anodized Aluminum
If there’s one thing I’ve learned over the years, it’s this: satin anodized aluminum is incredibly rewarding when done right, but incredibly unforgiving when done wrong. The margin for error is slim, and it’s easy to run into issues that mess with both appearance and performance.
This section breaks down the most common issues I’ve encountered (or heard about from shops and peers), along with how I’ve personally addressed them.
🚨 The Most Common Problems with Satin Anodized Aluminum CNC Parts
| Problem | What It Looks Like | What Caused It |
|---|---|---|
| Color inconsistencies | Some parts darker/lighter than others | Uneven cleaning, batch anodizing variation |
| Surface blotches or stains | Irregular spots post-anodizing | Contaminants, poor rinsing after machining |
| Tool marks visible after anodizing | Milling lines or scratches showing through the finish | Aggressive cutting, no finish pass |
| Thread interference or galling | Screws bind or strip threads | Anodizing layer thickened thread, no post-processing |
| Warping of thin parts | Slight deformation after anodizing | Thermal stress or uneven fixturing during machining |
🧪 Color Mismatch? Here’s Why It Happens
I once worked on a small run of 50 precision control panels. They were all machined to spec, but after anodizing, 15 of them were visibly different in shade. The client noticed it right away—and wasn’t happy.
We traced the problem back to two things:
- The parts were anodized in two separate batches, with slightly different bath conditions.
- Some parts had cutting fluid residue, even though they were supposedly cleaned.
Lesson learned: Always batch-clean and batch-anodize when color consistency matters. If you have to anodize in stages, inform the client and note potential variance.
💡 Fixing and Preventing Issues
Let me break it down into two parts: prevention and repair.
✅ Prevention Checklist (from experience):
- Use ultrasonic cleaning or alcohol wipe-down before anodizing
- Avoid touching parts with bare hands after cleaning
- Use consistent toolpaths and feed/speed settings across parts
- Batch process parts for anodizing
- Label parts subtly to track batch groups
🔁 What If It’s Already Anodized and Looks Bad?
You’ve got a few options:
- Re-anodizing: Works if parts aren’t severely flawed, but removes a bit of material.
- Bead blasting + re-anodizing: Evens out the surface if tool marks or stains are deep.
- Dyeing darker: If original color was light (e.g., silver), you may be able to re-dye it darker to mask issues.
- Touch-up with chemical etch: Rare, but works for tiny cosmetic blemishes.
📊 Table: CNC + Anodizing Problem Solver
| Problem | Solution | Prevention Tip |
|---|---|---|
| Uneven anodizing thickness | Control bath time, avoid sharp corners | Add small radii, soften sharp features |
| Stains or discoloration | Clean parts before anodizing | Use IPA or ultrasonic cleaner |
| Tool marks visible | Add finish pass with sharp end mill | Reduce cutting speed slightly |
| Thread galling | Tap after anodizing or use thread inserts | Avoid anodizing internal threads |
| Color mismatch | Batch anodize, control rinse cycle times | Standardize prep and communication with anodizer |
💬 A Bit of Perspective
I’ll be honest—early in my CNC journey, I didn’t take the post-machining cleaning seriously. That cost me a few batches of anodized parts. Now I treat cleaning as part of the machining process, not just a “send it out” afterthought.
It’s small stuff like that—rinsing, soft edge breaks, even wearing gloves—that separates a good part from a great one.
Real-World Use Case
Let me take you behind the scenes on a project I did about a year ago. It was a mid-volume production run—around 300 units—of a custom audio interface enclosure. The product was going to market in a highly competitive space, so visual finish, durability, and tactile feel were all critical.
The client originally wanted brushed stainless steel. Looked great in theory, but:
- It was too heavy.
- It scratched easily in shipping.
- It was hard to machine precisely.
So I suggested we explore satin anodized aluminum instead. We ran five test enclosures in 6061-T6, CNC machined and then satin anodized in dark grey. The result blew both of us away.
✨ Key Wins in the Project
| Feature | Satin Anodized Result |
|---|---|
| Weight | 50% lighter than original stainless design |
| Surface Finish | Smooth, fingerprint-resistant, premium feel |
| Color Consistency | All units perfectly matched (thanks to batch anodizing) |
| Branding | Laser-etched logo came out crisp and subtle |
| Shipping durability | Survived packaging and transport without visible scratches |
📐 Design Highlights
- 0.125” wall thickness, machined from solid billet
- Tolerances: ±0.002” for port openings
- Laser-engraved logo post-anodizing
- All fastener holes pre-tapped with heli-coils installed
- Parts cleaned with ultrasonic wash before anodizing
🔍 CNC & Finish Strategy Used
| Step | Process |
|---|---|
| Rough Machining | 3-flute ZrN-coated end mills, high feed, flood coolant |
| Finish Pass | Light cut at 0.005” with clean edges |
| Deburring | Manual deburr with soft stone |
| Cleaning | Ultrasonic bath + IPA wipe-down |
| Anodizing | Type II satin anodizing, dark gray dye |
| Branding | Laser etching done after anodizing |
Client Feedback
“We were going for an Apple-level unboxing experience. What you delivered exceeded expectations. The finish feels luxurious, but you kept it within budget.”
That stuck with me. It proved that satin anodized aluminum doesn’t just solve problems—it can elevate the product. And in this case, it helped the client stand out in a crowded market.
Supplier Considerations and Sourcing Satin Anodized Aluminum for CNC Projects
If there’s one thing that can quietly derail a CNC project, it’s a supplier who doesn’t understand the nuances of satin anodized aluminum. I’ve worked with some excellent partners—and a few disasters. What I’ve learned is that sourcing the right material and finish isn’t just about price—it’s about precision, communication, and process control.
In this section, I’ll walk through where and how I source satin anodized aluminum, what I ask suppliers, and what to look out for.
🔍 Where to Source Satin Anodized Aluminum
There are two main routes to get satin anodized aluminum parts:
- Buy pre-anodized sheet/stock and machine it
- Machine raw aluminum and anodize afterward
Each has pros and cons:
| Source Type | Pros | Cons |
|---|---|---|
| Pre-anodized Stock | Faster for simple parts, eliminates post-processing | Limited thicknesses, risk damaging surface during CNC |
| Raw Aluminum + Anodizing | Custom color, better finish control | Longer lead time, needs trusted anodizing partner |
In 90% of my work, I go with raw 6061-T6 bar or plate and have parts anodized after machining. That’s what gives the most consistent results in both look and tolerance.
🛠️ What to Look for in a CNC Shop or Anodizing Supplier
When I vet a new supplier for satin anodized aluminum work, these are my non-negotiables:
| Question to Ask Supplier | Why It Matters |
|---|---|
| “Do you specialize in Type II or Type III anodizing?” | Type II is better for color and satin finish |
| “What’s your color variation range across batches?” | Ensures consistency in appearance |
| “How do you prep parts before anodizing?” | Proper cleaning = better results |
| “Do you offer bead blasting before anodizing?” | Optional, but improves uniformity for satin finishes |
| “Can you meet tolerance adjustments post-anodizing?” | Critical if exact fit is needed after oxide buildup |
📊 Table: Supplier Evaluation Criteria for Satin Anodized Aluminum
| Supplier Attribute | Must-Have for Satin Anodized CNC Work |
|---|---|
| Aluminum Grade Available | 6061-T6 or better |
| Surface Cleanliness Protocols | Ultrasonic or alcohol wipe-down before anodizing |
| Batch Color Consistency | Within ±5% tonal shift across parts |
| Re-anodizing Capability | Optional, useful for color correction |
| Communication & File Handling | Accepts CAD + machining drawings with finish notes |
🤝 Personal Sourcing Experience
For medium-scale production, I’ve used regional anodizing shops in Southern California. I send machined parts along with clear instructions—including:
- Desired anodizing type (Type II)
- Satin finish (matte, non-reflective)
- Color code or Pantone reference
- No anodizing on threads or masked areas
I also request a few sample parts to be anodized first. This has saved me more than once from a full batch going sideways.
⚠️ Common Mistakes When Sourcing
- Not specifying satin finish clearly – Shops may default to glossy or brushed anodizing unless told otherwise.
- Assuming all anodizing is the same – Different shops = different chemicals, temperatures, and handling.
- Overlooking post-processing requirements – If you need laser etching after anodizing, make sure the coating is compatible.
The more detail you provide, the better your outcome. Never assume your supplier “just knows” what satin anodized aluminum means.
FAQ
Here are some of the most common questions I get from clients, colleagues, and readers—summed up with straight, field-tested answers.
1. What’s the difference between satin anodized aluminum and brushed anodized aluminum?
Satin anodized aluminum has a soft, uniform matte finish—achieved by light bead blasting or chemical treatment before anodizing.
Brushed anodized aluminum has linear texture lines from mechanical brushing. It reflects more light and shows fingerprints more easily.
2. Can I anodize aluminum myself?
Technically yes, but I don’t recommend it unless you’re running a controlled lab environment. Commercial anodizing involves precise chemical handling, voltage, and timing. For satin finishes especially, it’s best to leave it to professionals.
3. Can CNC machining damage the anodized layer?
Yes—machining after anodizing can break the oxide layer, especially around holes or edges. That’s why I always recommend machining first, anodizing second.
4. How thick is the anodized layer?
For Type II satin anodized aluminum, the oxide layer usually ranges from 0.0002” to 0.001” per surface. This may affect tight-tolerance features, especially mating parts or sliding fits.
5. Is satin anodizing available in custom colors?
Yes. You can dye the anodized layer during the process. Black, gray, blue, red, and gold are common. Keep in mind that color shades can vary slightly between batches unless tightly controlled.
6. Can satin anodized aluminum parts be repaired if scratched?
Minor scratches can sometimes be masked or buffed. But generally, you can’t “touch up” anodizing like you can paint. Deep flaws require re-anodizing the whole part.
7. Is it expensive?
It depends. Satin anodizing adds cost over raw aluminum, but compared to powder coating or stainless steel, it’s often more economical for small to mid-size parts.
For context:
| Process | Estimated Added Cost per Part (USD) |
|---|---|
| Raw CNC Aluminum | Base price |
| + Satin Anodizing | +$2 to $8 |
| + Laser Engraving | +$1 to $5 |
| + Tight Tolerance QC | +$1 to $3 |
Authoritative References
- Anodizing – Wikipedia An in-depth overview of the anodizing process, including its history, types, and applications across various metals.
👉 https://en.wikipedia.org/wiki/Anodizing - Aluminium Alloy – Wikipedia Explores the properties, classifications, and uses of aluminum alloys, highlighting their relevance in anodizing and CNC machining.
👉 https://en.wikipedia.org/wiki/Aluminium_alloy - Aluminium Oxide – Wikipedia Details the characteristics of aluminum oxide, the protective layer formed during anodizing, and its significance in enhancing corrosion resistance.
👉 https://en.wikipedia.org/wiki/Aluminium_oxide - Anodic Aluminium Oxide – Wikipedia Discusses the structure and formation of anodic aluminum oxide, emphasizing its applications in nanotechnology and material science.
👉 https://en.wikipedia.org/wiki/Anodic_aluminium_oxide - Passivation (Chemistry) – Wikipedia Provides insights into the passivation process, including anodizing, and its role in protecting metals like aluminum from corrosion.
👉 https://en.wikipedia.org/wiki/Passivation_(chemistry) - Photosensitive Anodized Aluminum – Wikipedia Explores the specialized process of creating images on anodized aluminum surfaces, showcasing the versatility of anodizing techniques.
👉 https://en.wikipedia.org/wiki/Photosensitive_anodized_aluminum
These resources offer a deeper understanding of the materials and processes integral to working with satin anodized aluminum in CNC applications. They are invaluable for professionals seeking to enhance their knowledge or troubleshoot specific challenges in their projects.
Other Articles You Might Enjoy
- Clear Anodized Aluminum Explained: Material Benefits, Use Cases and Buying Tips
Introduction When I first came across clear anodized aluminum, I was designing a custom electronics enclosure for a client in the industrial automation field. They wanted something lightweight, durable, and…
- Why Choose Hard Anodized Aluminum for CNC Machined Parts?
Why Hard Anodized Aluminum and CNC Machining Are Your Best Choice If you're a customer seeking high-performance, durable, and precision-engineered parts, this article is tailored to your needs. Hard anodized…
- The Ultimate Guide to Anodized Aluminum Machining: Properties, Processes, and Applications
Chapter 1: Introduction to Anodized Aluminum Anodized aluminum is not just aluminum with a colorful finish. It is aluminum that has been treated through an electrochemical process to form a…
- Surface Treatment After CNC Machining Applications of the Anodized Aluminum Colors Chart
In the world of manufacturing, CNC machining is a cornerstone of precision and efficiency, especially when it comes to working with aluminum. However, the journey of a part doesn’t end…
- The Role of Surface Finishes in CNC Machining: Anodized Aluminum vs. Stainless Steel
The Role of Surface Finishes in CNC Machining: Anodized Aluminum vs. Stainless Steel CNC machining, standing for Computer Numerical Control, represents a prevalent technology used in the manufacturing sector where…
- Anodized vs. Non-Anodized Aluminum: Which Is Better for CNC Projects?
An Introduction to Anodized and Non-Anodized Aluminum in CNC Projects In the realm of Computer Numerical Control or CNC projects, aluminum assets serve a pivotal role. Two classifications include anodized…
- Titanium Color and CNC Machining Techniques Explained
Introduction: The Appeal of Titanium Color in CNC Machining Titanium has always fascinated industries for its lightweight yet strong properties, but its natural titanium color adds an extra layer of…
- Powder Coating Cost Calculator Guide: Estimating Jobs by Size, Shape, and Volume
Introduction: Why Accurate Powder Coating Cost Estimation Matters When I first started exploring powder coating as an option for metal finishing, I underestimated how important accurate cost estimation really was.…
- Ceramic Coating and Machining: Unlocking Advanced Manufacturing Applications
Introduction I’ve been fascinated by the way ceramic coating can radically transform the performance of machined parts. Ceramic coating, as a concept, goes well beyond the automotive finishes many of…