Introduction
When working in CNC machining, selecting the right material can make or break a project. One material I’ve come to appreciate over the years is PMMA material—better known as acrylic or Plexiglas®. It’s lightweight, optically clear, and incredibly versatile. For CNC work, especially when you need transparency and good aesthetics, PMMA material often becomes the top choice.
This guide covers everything I’ve learned through hands-on experience about working with PMMA material in CNC environments. We’ll explore its characteristics, machining behavior, real-world applications, and best practices. Whether you’re a CNC operator, product designer, or procurement specialist, this is the essential knowledge you need to confidently choose and work with PMMA material.
What is PMMA Material?
Definition
PMMA (Poly(methyl methacrylate)) is a transparent thermoplastic often used as a lightweight and shatter-resistant alternative to glass. Commercially, it’s marketed under names like Acrylic, Plexiglas®, Acrylite®, and Lucite®.
It’s one of the most widely used transparent plastics in the world. I’ve used it in everything from prototype enclosures to display panels, and it performs remarkably well when processed correctly.
Key Physical Properties
Here’s a quick reference table that summarizes the key properties of PMMA material:
| Property | Value Range | Notes |
|---|---|---|
| Density | ~1.18 g/cm³ | ~50% of the weight of glass |
| Transparency | ~92% light transmission | Higher than most other plastics |
| Hardness | M70 – M100 (Rockwell) | Fairly hard and scratch-resistant |
| Impact Resistance | Moderate | More brittle than PC, but safer than glass |
| Heat Resistance | ~80–100°C (working temperature) | Can soften at higher temps |
| Melting Point | ~160°C – 200°C | Important when setting CNC spindle speeds |
| Water Absorption | Low | Suitable for indoor/outdoor applications |
| Flammability | Burns easily, non-drip | Flame-retardant grades are available |
In my own shop, the optical clarity alone makes PMMA worth using for panels, windows, or any component that needs to be both strong and see-through.
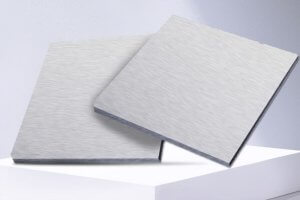
Cast PMMA vs. Extruded PMMA
There are two main types of PMMA material:
- Cast PMMA:
- Produced by polymerizing MMA monomer in molds
- Has better optical clarity, thermal resistance, and machinability
- More expensive
- Better for CNC milling (less likely to melt or gum up)
- Extruded PMMA:
- Made by pushing material through dies
- Lower cost and more uniform
- Slightly softer and more prone to melting when CNC milled
- Works okay with laser cutting and less demanding CNC operations
When I need ultra-clear parts or deep pocketing with minimal distortion, I always go with cast PMMA. It handles CNC operations more cleanly and gives a better surface finish.
Advantages of PMMA Material
- Exceptional clarity – often used in light guides, optical windows
- Weather resistance – ideal for outdoor use (with UV-stabilized grades)
- Lighter than glass – easier to mount and ship
- Good rigidity – holds shape well during machining
- Accepts polishing well – can achieve near-glass surface finishes
Disadvantages
- Brittle compared to polycarbonate
- Can melt if overheated during CNC machining
- Poor chemical resistance to solvents like acetone
- Flammable unless using fire-rated variants
Understanding these trade-offs helps you decide where PMMA material fits best—and where it doesn’t.
Common PMMA Grades
| Grade Type | Application Focus | CNC Machining Suitability |
|---|---|---|
| General Purpose | Signage, display, enclosures | Good |
| Optical Grade | Lenses, light guides | Excellent |
| Impact Modified | Safety barriers, guards | Fair |
| UV-Resistant | Outdoor signs, skylights | Good |
| Anti-static | Electronic display covers | Moderate |
I’ve found optical-grade cast PMMA the easiest to machine and polish, particularly for customer-facing components.
Is PMMA Material Suitable for CNC Machining?
When I first worked with PMMA material on a CNC mill, I wasn’t sure if it would behave well. I expected issues like melting, cracking, or chipping. Luckily, with the right techniques, I discovered PMMA material is not just suitable for CNC machining—it’s excellent for creating high-precision, beautiful parts.
Why PMMA Material is CNC-Friendly
PMMA material’s physical properties make it an ideal candidate for CNC machining. Here’s why:
- Stable structure: It doesn’t deform much under the cutting forces common in CNC milling.
- Predictable chip formation: PMMA produces consistent, manageable chips instead of stringy messes.
- Good dimensional stability: You can hold tight tolerances, which is crucial for parts like optical windows or fit-critical housings.
- Excellent surface finish: Properly machined PMMA material can be polished to a near-glass shine without needing post-processing coatings.
During a project where I had to fabricate custom light guide plates for a medical device, using PMMA material made the difference between a cloudy, rough surface and a crisp, crystal-clear product.
Advantages of Using PMMA Material in CNC Machining
| Advantage | Description |
|---|---|
| High Transparency | Perfect for display windows, covers, lenses |
| Lightweight but Rigid | Easier to handle large parts without flex or sagging |
| Easy to Polish | Can achieve optical-grade clarity after machining |
| Consistent Machinability | Cuts cleanly with predictable chip patterns |
| Weather and UV Resistance | Great for outdoor panels or signage |
In my shop, PMMA quickly became the go-to choice for any project requiring visible parts that needed to impress customers with clarity and cleanliness.
Common Challenges When Machining PMMA Material
Despite its many advantages, PMMA material does come with a few challenges:
| Challenge | Why It Happens | How to Solve It |
|---|---|---|
| Melting and gumming | Excessive heat buildup | Use high spindle speed with low feed rates |
| Cracking at edges | Brittle nature of PMMA | Use sharp tools and climb milling techniques |
| Chipping during entry/exit | Poor chip evacuation or dull tools | Ensure smooth lead-ins and sharp cutters |
| Poor surface finish | Incorrect toolpath strategies | Use finishing passes with light cuts |
The first time I machined PMMA without adjusting speeds and feeds, I ended up melting a nice trail behind the cutter. Since then, I always watch temperatures closely and use aggressive cooling air blasts or mist cooling.
Real-World Tip
Use single-flute polished end mills designed for plastics.
I switched from standard two-flute mills to polished single-flute cutters early on, and the improvement in edge clarity and surface finish was night and day.
Also, always leave 0.1–0.2 mm for a final light finishing pass. It removes heat-affected zones and gives PMMA material that perfect polished look.
Quick Comparison: PMMA vs. Other Plastics for CNC
| Property | PMMA Material | Polycarbonate (PC) | ABS Plastic |
|---|---|---|---|
| Transparency | ~92% | ~88% | Opaque |
| Impact Resistance | Moderate | High | Moderate |
| Machinability | High | Moderate (tougher) | High |
| Surface Polish | Excellent | Good | Fair |
| Cost | Moderate | Higher | Lower |
If you need maximum optical quality and smooth finishing, PMMA material is definitely the winner among common CNC plastics. It’s what I use every time my project demands a combination of beauty and precision.
Summary of Suitability
In short, PMMA material is highly suitable for CNC machining—provided you respect its limits. Proper tooling, smart feed rates, sharp cutters, and good chip management will turn PMMA into one of the most satisfying materials you’ll ever machine.
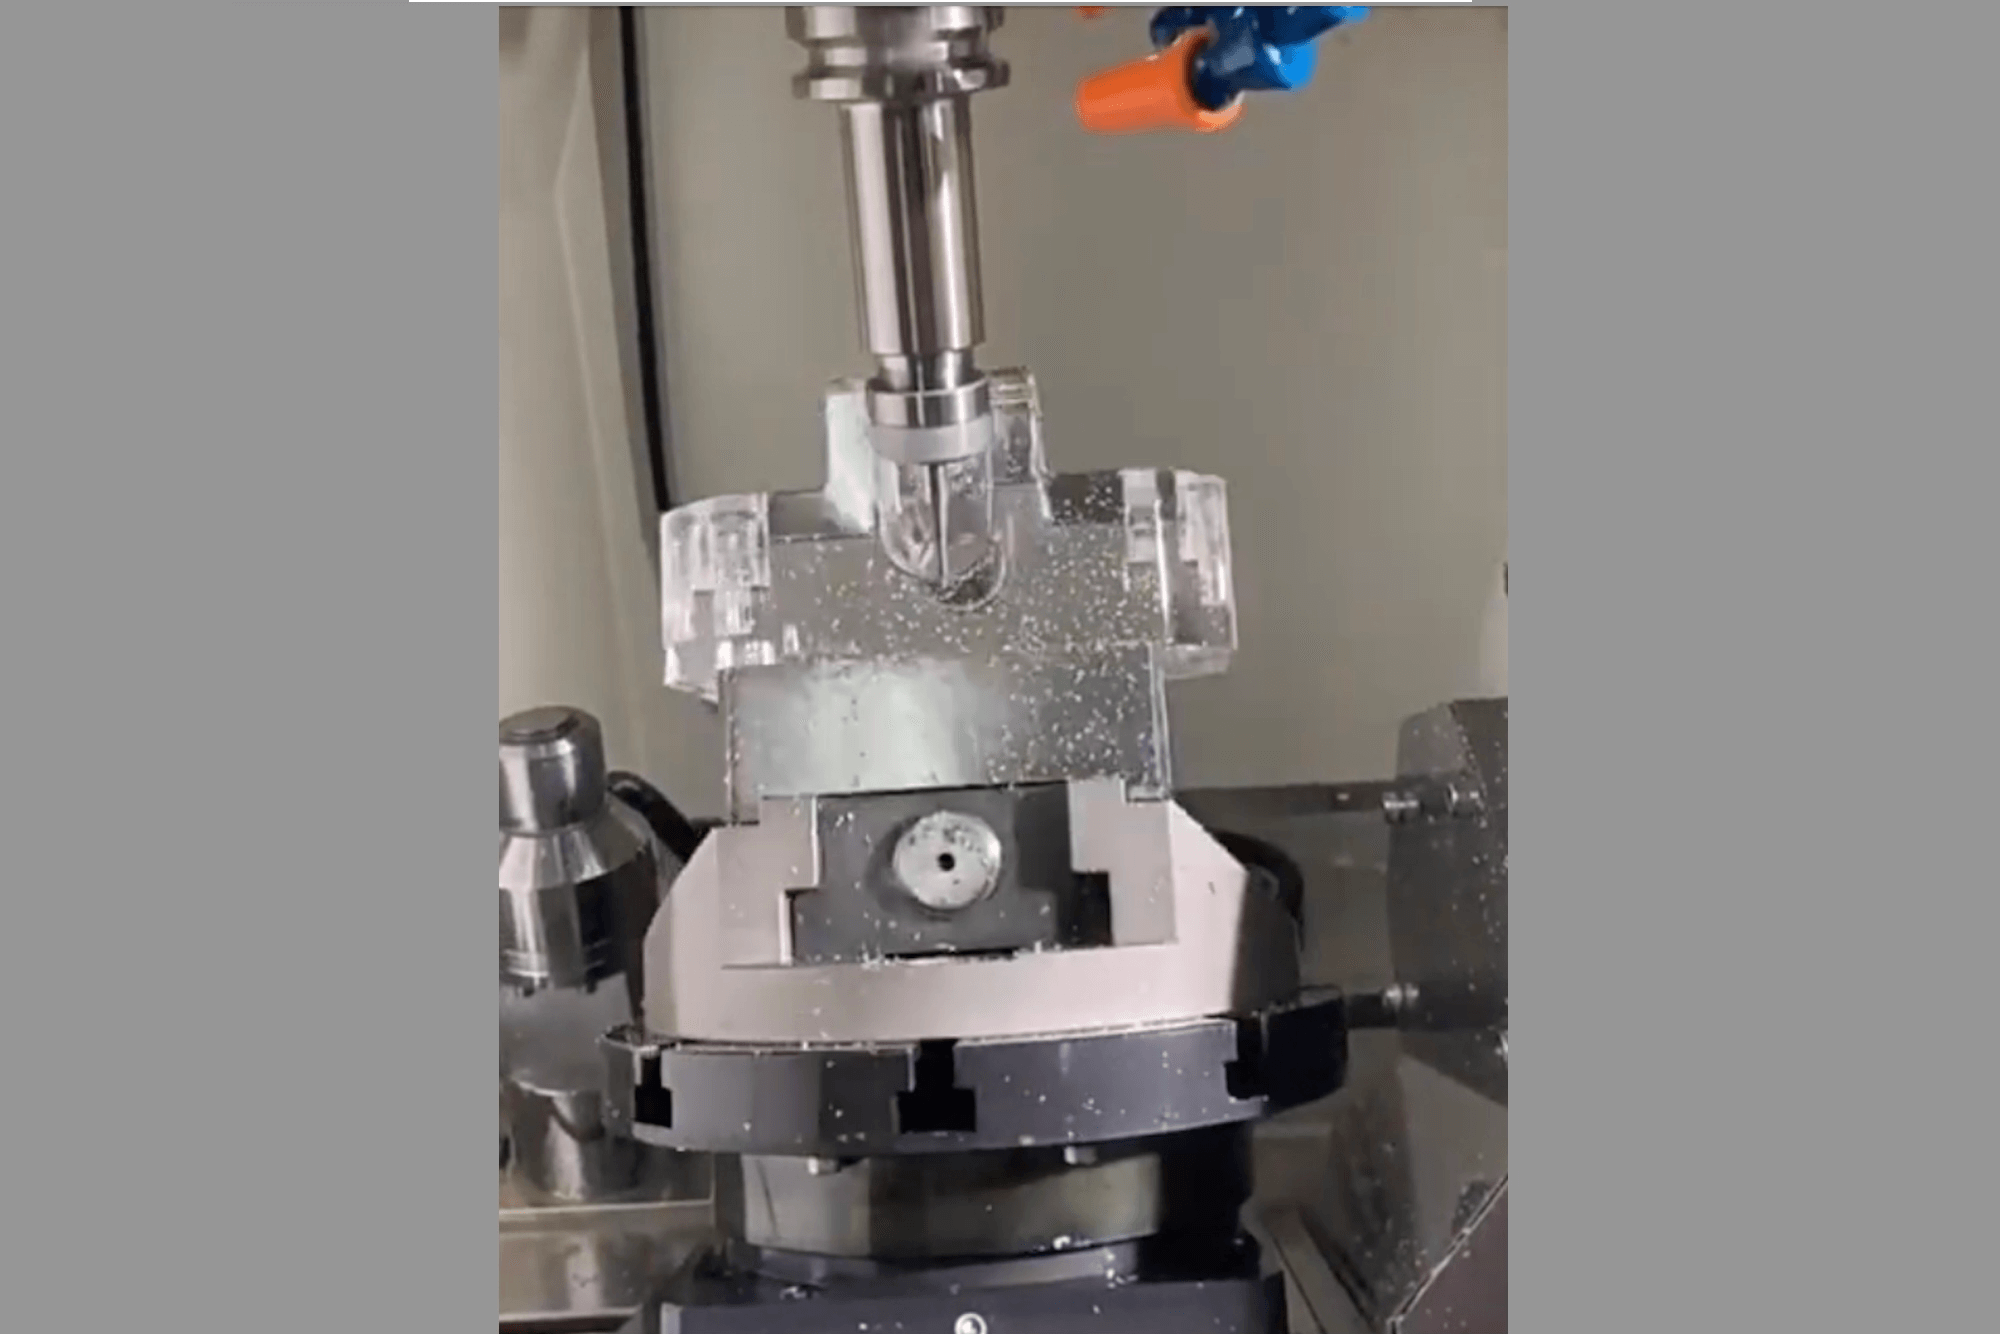
CNC Machining Techniques for PMMA
Working with PMMA material on a CNC machine can be extremely rewarding if you approach it with the right techniques. Over the years, I’ve had my share of cracked sheets, melted edges, and less-than-perfect finishes. Through trial and error—and a lot of broken stock—I’ve developed a set of techniques that consistently deliver great results.
Here’s everything I know about machining PMMA material successfully.
Best Tool Selection for PMMA Material
Choosing the right cutting tool is the first major decision. Standard end mills made for metals often perform poorly with PMMA. They tend to generate too much heat, causing the material to melt or gum up.
Here’s a quick comparison table of the best tool types:
| Tool Type | Recommendation for PMMA Machining | Notes |
|---|---|---|
| Single-Flute End Mill | Highly recommended | Reduces heat buildup |
| Polished Flute Cutter | Essential for best surface finish | Helps with chip removal |
| Up-Cut Spiral End Mill | Good for clearing chips, may require extra holding | |
| Straight Flute Plastic Cutter | Good alternative for thick PMMA sheets | Smooth finishes |
| Compression End Mill | Only for special edge-critical cases | Used sparingly |
Personally, switching to single-flute, polished cutters was the biggest upgrade I ever made for CNC machining PMMA material. It practically eliminated the melting issues I struggled with early on.
Recommended CNC Parameters for PMMA Material
Setting your spindle speed, feed rate, and depth of cut correctly is critical. If you get even one of these wrong, you’ll end up melting, chipping, or cracking your PMMA material.
Here’s the general setup I use:
| Drill/Endmill Size | Spindle Speed (RPM) | Feed Rate (mm/min) | Depth of Cut (mm per pass) | Cooling Recommendation |
|---|---|---|---|---|
| 1–2 mm | 18,000–22,000 | 500–800 | 0.3–0.5 | Air blast or mist cooling |
| 3–6 mm | 15,000–18,000 | 800–1200 | 0.5–1.0 | Air blast preferred |
| 8–12 mm | 12,000–15,000 | 1200–1800 | 1.0–1.5 | Mist cooling recommended |
| 15 mm and above | 8000–12,000 | 1500–2000 | 1.5–2.0 | Strong air blast |
Important Tip:
Always prioritize higher spindle speeds combined with lower chip loads to keep heat minimal.
When I ignored this rule and used slower spindle speeds early in my learning phase, I saw PMMA material melt into ugly clumps on the bit.
Importance of Coolant and Chip Removal
While PMMA material does not require traditional flood coolant, some form of chip clearing is essential. Chips re-cutting can cause serious surface damage.
What works best:
- Air blast: Cleans chips quickly without wetting the material.
- Mist coolant: Helps if your cuts are very aggressive or if the ambient temperature is high.
- No coolant: Only for very thin passes or low-speed cuts (riskier for quality).
Personally, I favor compressed air nozzles positioned to blow directly onto the tool path during all my PMMA jobs.
How to Prevent Cracking, Melting, and Chipping
Over time, I developed a checklist that now guides almost every PMMA project:
- Sharp tools only – No compromises.
- High RPM, low feed per tooth – Prevent heat accumulation.
- Use climb milling – This reduces the chance of chipping at exit edges.
- Leave finishing allowance – Always leave 0.1–0.2mm for a final, slow finishing pass.
- Secure work holding – Prevent sheet vibration using vacuum beds or mechanical clamps.
Neglecting just one of these practices cost me hours reworking jobs in the past.
Surface Finishing Techniques for PMMA Material
Even after good CNC work, PMMA often needs post-processing to truly shine. Here are my surface finishing methods:
| Finishing Method | Application | Notes |
|---|---|---|
| Sanding (wet sanding) | Removing light tool marks | Start at 600 grit, move to 2000+ grit |
| Flame Polishing | Melting the surface lightly | Only skilled hands; fast movement needed |
| Buffing with Polishing Compound | Achieving mirror finish | Use soft wheels and plastic polish |
| Vapor Polishing (advanced) | Laboratory-grade optical parts | Requires controlled chemical environment |
Personal Tip:
I usually use wet sanding followed by buffing for 95% of my PMMA parts. It’s safe, cost-effective, and gives a beautiful clear finish without needing specialized equipment.
Real-World Lessons
One of my earliest large PMMA jobs involved machining 20+ optical panels. I mistakenly skipped using an air blast setup. By the time I finished, most parts had fine surface haze from chip re-cutting. That mistake cost me two extra days sanding and polishing manually.
Since then, ensuring proper chip evacuation became my golden rule.
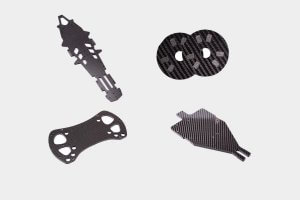
Practical Applications of CNC-Machined PMMA Parts
Over the years, I’ve come to realize that PMMA material isn’t just good on paper—it’s a game-changer across many industries. Once I got comfortable machining PMMA, I started noticing how often it’s used in real-world products. In fact, some of my earliest freelance CNC jobs involved making display cases and prototype enclosures entirely from PMMA.
Here’s where CNC-machined PMMA material truly shines.
Display Cases and Advertising Signs
One of the most common applications for PMMA material is in creating crystal-clear, professional-looking display cases and advertising signs.
I’ve machined parts for jewelry displays, museum cases, and luxury retail counters where absolute clarity was non-negotiable.
Key advantages PMMA brings to displays:
- High transparency for maximum visibility
- Easy polishing for that “glass-like” finish
- Lightweight for easy mounting or suspension
Example:
I once completed a project for a tech company’s exhibition booth where I CNC-machined a series of sleek, custom-shaped PMMA display stands. The finished pieces looked like they belonged in an Apple store—perfectly clear, scratch-free, and durable.
Medical Device Housings
In the medical sector, aesthetics are just as important as function. PMMA material is often used for device housings that need to be sterilized, seen through, or visually appealing.
Typical uses:
- Covers for diagnostic machines
- Clear protective shields
- Surgical light components
What makes PMMA ideal here:
- Biocompatibility (for non-invasive parts)
- Smooth surface achievable via CNC and polishing
- Resistance to many cleaning agents
I’ve personally machined small runs of prototype housings for a local medical device startup. They demanded perfect clarity and tight tolerances—exactly what PMMA delivers when handled right.
Automotive Lighting Components
Modern car headlights and tail lights often rely on high-quality plastics. PMMA material plays a big role in prototypes and even production parts for:
- Light guide panels
- LED diffusers
- Custom indicator covers
PMMA’s ability to transmit and diffuse light effectively makes it the top choice. I remember machining complex LED diffuser shapes for a custom car builder; the precision needed was tough, but PMMA held up beautifully during CNC milling and polishing.
Protective Covers and Optical Panels
PMMA material is perfect for protective covers over electronics, machinery gauges, and industrial control panels.
Key benefits here:
- High impact resistance (better than regular glass)
- Optical clarity without distortion
- Excellent weather resistance for outdoor devices
Real-world example:
For one of my clients in the agricultural tech space, I machined several batches of PMMA covers for smart irrigation sensors. These needed to survive rain, sunlight, and physical impacts—PMMA was an easy choice.
Light Diffusers and Lenses
When I worked with an architectural lighting firm, they often requested PMMA material for custom light diffusers.
It’s the best material to:
- Evenly distribute LED light
- Create smooth, uniform lighting effects
- Prevent “hot spots” in lighting arrays
Laser-etching tiny patterns into PMMA can control how light spreads, but even simple CNC surface finishes can significantly improve lighting quality.
Table: Summary of PMMA Material Applications
| Industry | PMMA Application | Why PMMA is Chosen |
|---|---|---|
| Advertising & Retail | Display cases, signs | High clarity, light weight |
| Medical Devices | Equipment housings, shields | Smooth surface, biocompatibility |
| Automotive | Light guides, LED covers | Light transmission, formability |
| Industrial Equipment | Control panel covers, gauge windows | Toughness, weather resistance |
| Architecture & Lighting | Light diffusers, lenses | Even lighting, aesthetic finish |
Real-World Observations
In almost every case where I needed a clear, professional-looking, and durable plastic part, PMMA materialoutperformed cheaper options like polycarbonate or ABS—especially when optical appearance mattered.
Sure, it’s slightly more brittle, but with good CNC machining practices, you rarely have any serious cracking issues.
CNC Case Studies Using PMMA
Learning to machine PMMA material well didn’t happen overnight. In fact, a lot of what I know today comes from real-world projects—some successful, some that taught me hard lessons. I want to share a few memorable CNC case studies with you. Hopefully, they’ll save you time, materials, and frustration.
Case Study 1: High-End Jewelry Display Cases
Project Goal: Machine crystal-clear display covers for a luxury jewelry brand.
Challenges Encountered:
- Required absolutely flawless surfaces (no tool marks, haze, or scratches).
- Tight tolerances on edge joints for seamless glue bonding.
- Needed to avoid any crazing or microcracks under adhesive stress.
What I Learned:
- Always use freshly sharpened single-flute, polished endmills.
- Wet sanding post-machining was essential for a mirror finish.
- Flame polishing added that final “luxury glass” look.
Result:
Final parts looked indistinguishable from actual glass. The client was so impressed they ordered additional display towers for a second store.
Case Study 2: Medical Device Optical Covers
Project Goal: Manufacture clear PMMA covers for a diagnostic machine prototype.
Challenges Encountered:
- Internal pockets had to be machined while keeping both sides optically clear.
- Heat buildup risked distorting thin sections.
- Dust and static cling caused minor surface defects during handling.
What I Learned:
- Machine both sides carefully, using light passes and lots of air cooling.
- After machining, use anti-static cleaners before packaging.
- Never stack unprotected PMMA parts—they scratch incredibly easily.
Result:
The prototype devices looked professional and operated perfectly. Our success led to a small production run of over 500 units—all using PMMA material.
Case Study 3: Automotive LED Diffusers
Project Goal: CNC machine custom light diffusers for a concept car’s interior.
Challenges Encountered:
- Complex curved surfaces needed perfect, even light distribution.
- Tight radius corners prone to cracking during finishing operations.
- Slight tool marks were exaggerated when backlit.
What I Learned:
- Adjust toolpaths to follow natural material grain, minimizing surface stress.
- Finish with ultra-fine (2000 grit) wet sanding before polishing.
- Allow slow, progressive heating during flame polishing to avoid stress fractures.
Result:
When installed, the light spread across the diffusers was beautifully uniform—no bright spots, no cracks, and minimal polishing artifacts.
Case Study 4: Outdoor Smart Sensor Covers
Project Goal: Build durable, weather-resistant PMMA enclosures for agricultural IoT devices.
Challenges Encountered:
- Parts needed to survive UV exposure, rain, and mechanical impacts.
- Outdoor use meant dimensional stability over time was critical.
- Budget constraints required minimal post-processing.
What I Learned:
- Always select UV-stabilized PMMA grades for outdoor jobs.
- Slight over-sizing (compensating for possible expansion/shrinkage) helped maintain fit over seasons.
- Air-cooled machining alone was sufficient—no expensive mist systems needed.
Result:
Devices installed in the field stayed crystal clear and weather-resistant after two full years of service—far outperforming cheaper alternatives like polycarbonate or PETG.
Table: Common Mistakes vs Solutions When Machining PMMA Material
| Mistake | Problem Caused | Solution Based on Experience |
|---|---|---|
| Using dull or wrong endmills | Poor edge quality, chipping | Always use sharp, single-flute cutters |
| Ignoring cooling during machining | Melting, gummy chips | Use air blast or mist cooling |
| Taking aggressive cuts | Cracks, surface defects | Light passes, multiple finishing steps |
| Poor workholding setup | Vibrations, inaccuracies | Secure clamping or vacuum tables |
| Skipping finishing process | Dull, foggy surface | Wet sanding + buffing or flame polish |
Personal Reflection
When I started CNC machining PMMA material, I thought it would be simple—cut it like any other plastic, right? Wrong. PMMA demands patience, precision, and finesse.
But once you dial in the right techniques, there’s almost no better material for creating stunning, professional-looking components. It’s become one of my personal favorites for projects where presentation matters just as much as performance.
FAQ
Over the years, while machining PMMA material, I’ve run into a lot of questions—both my own early questions and ones from colleagues and clients. Here are the most common ones, with straightforward answers based on real-world experience.
1. What exactly is PMMA material made of?
PMMA stands for Poly(methyl methacrylate). It’s a synthetic polymer created by polymerizing methyl methacrylate (MMA) monomers.
In simple terms, it’s a type of engineered plastic known for its glass-like transparency and excellent weather resistance.
2. What are the main differences between cast and extruded PMMA sheets?
- Cast PMMA is more optically pure, easier to machine cleanly, and has better chemical resistance.
- Extruded PMMA is cheaper, more uniform in thickness, but slightly softer and prone to melting during CNC machining.
I always prefer cast PMMA material when precision or a perfect finish is critical.
3. Why is PMMA preferred over glass in CNC applications?
PMMA material offers:
- About half the weight of glass
- Higher impact resistance (less shattering)
- Easier CNC machinability
- Simpler polishing processes
When I need something that looks like glass but is safer and easier to fabricate, PMMA is my first choice.
4. Can PMMA be CNC milled, drilled, and cut efficiently?
Absolutely. PMMA material machines beautifully when you use sharp tools, proper feeds and speeds, and maintain good chip evacuation.
I regularly mill, drill, and contour-cut PMMA for high-end projects.
5. What type of CNC tool is best for machining PMMA?
- Single-flute end mills with a polished finish are ideal.
- Straight flute cutters also work for thick sheets.
- Always prioritize cutters designed for plastics, not metals.
Sharpness is everything when working with PMMA material.
6. What are the ideal spindle speeds for CNC machining PMMA?
- Small tools (1–2 mm): 18,000–22,000 RPM
- Medium tools (3–6 mm): 15,000–18,000 RPM
- Large tools (8–12 mm): 12,000–15,000 RPM
I prefer higher spindle speeds to avoid heat buildup, paired with lighter feed rates.
7. How do I prevent PMMA from cracking during CNC milling?
- Always use sharp cutters.
- Use light, steady passes instead of heavy cuts.
- Climb milling instead of conventional milling often helps.
- Proper fixturing and low-vibration setups are crucial.
When I started doing this consistently, my PMMA cracking issues dropped to near zero.
8. Why does PMMA sometimes melt during CNC cutting, and how can I avoid it?
Melting happens because of heat buildup from friction.
Avoid it by:
- Using high RPMs with low feed per tooth
- Keeping tool sharpness in check
- Clearing chips constantly with air blasts or mist cooling
One time, a simple switch to a misting coolant system saved an entire batch of optical panels from being ruined.
9. Is coolant necessary when CNC machining PMMA?
Coolant is helpful but not mandatory.
- Air blast cooling works great for most jobs.
- Mist cooling is ideal for deeper cuts or larger jobs.
I usually run with air cooling unless the part is large or complicated.
10. How can I achieve a mirror-like finish on PMMA parts after machining?
Here’s my personal 3-step process:
- Wet sanding from 600 to 2000 grit.
- Buffing with a soft wheel and plastic polish.
- Optional flame polishing (carefully) for final touch.
If done right, the results look as good as polished glass.
11. What’s the recommended cutting depth per pass for PMMA?
Typically:
- Shallow passes: 0.3–1.0 mm for small tools
- Deeper passes: 1.0–2.0 mm for larger tools
I always err on the lighter side, especially for thin or delicate parts.
12. How tight are the achievable tolerances when machining PMMA?
You can reliably achieve:
- ±0.05 mm on typical CNC machines
- Tighter if using fine tooling and finishing passes
I’ve had success meeting ±0.02 mm tolerances on optical components, but it takes extra care.
13. How can I safely drill holes into PMMA without causing fractures?
- Use special plastic drill bits if possible.
- Slow, steady feed rates.
- Avoid too much pressure at breakthrough.
- Pre-drill pilot holes for large diameters.
Breaking through the backside too aggressively was one of my early mistakes when drilling PMMA.
14. Is laser cutting better than CNC milling for PMMA?
It depends:
- Laser cutting is faster and excellent for 2D profiles.
- CNC milling is better for thicker sheets, complex 3D geometries, and when edge quality matters.
For most of my high-precision jobs, CNC milling gives better results.
15. What’s the difference between working with PMMA vs polycarbonate (PC)?
| Property | PMMA Material | Polycarbonate (PC) |
|---|---|---|
| Transparency | Higher (~92%) | Slightly lower (~88%) |
| Impact Strength | Moderate | Very high |
| Machinability | Easier | Tougher, more flexible |
| Cost | Lower | Higher |
I pick PMMA material when clarity is the priority and PC when impact resistance is critical.
16. How does humidity or temperature affect PMMA during machining?
- PMMA is stable in typical shop conditions.
- High ambient heat can make PMMA more prone to softening.
- Very dry air can lead to more static buildup (annoying during polishing).
I keep my shop humidity around 40–50% for the best results when working with PMMA.
17. Can PMMA parts be bonded or glued after CNC machining?
Yes, easily.
- Solvent welding with specialized acrylic adhesives works great.
- Two-part epoxies also bond PMMA material well, though they can cause crazing if not applied carefully.
Surface preparation (light sanding + cleaning) is key to strong bonds.
18. How long do CNC-cut PMMA parts typically last in outdoor environments?
With UV-stabilized grades:
- 5–10 years easily outdoors.
- Possibly longer with protective coatings or covers.
Several agricultural devices I worked on still have crystal-clear PMMA windows after more than five years in the field.
19. Are there eco-friendly or recyclable options for PMMA materials?
Yes!
Some brands now offer recycled PMMA and bio-based PMMA variants.
PMMA itself is recyclable, though not as easily as PET or HDPE.
20. What safety precautions should I take when CNC machining PMMA?
- Always wear eye protection—PMMA chips can be sharp.
- Use dust extraction or masks if dry-milling to avoid inhaling fine dust.
- Keep fire safety in mind—PMMA is flammable if overheated.
I personally never skip wearing safety glasses when machining any plastics, including PMMA material.
Conclusion
Over the years, I’ve worked with many plastics in CNC machining, but PMMA material has earned a permanent spot on my shop shelf. It’s not just because of how good it looks when polished, or how cleanly it cuts with the right setup—it’s also about how versatile and consistent it is when you know what you’re doing.
From high-end product displays to field-deployed smart device covers, PMMA material has proven itself in real projects across industries. It offers excellent machinability, optical clarity, and a professional finish that few other materials can match.
That said, PMMA isn’t a “plug-and-play” material. It requires:
- The right tools (sharp, single-flute cutters)
- Precise settings (high spindle speeds and light passes)
- Consistent chip evacuation
- Post-processing care (sanding, polishing, or flame finishing)
Skipping any of these can lead to cracks, melting, or wasted material. But with the practices I’ve outlined in this guide—many of which I learned the hard way—you’ll be able to machine PMMA with confidence.
Key Takeaways
| Best For | Reasons PMMA Shines |
|---|---|
| High-clarity parts | Unmatched transparency (92%+) |
| Display and signage applications | Lightweight, polishable, and weather-resistant |
| Medical/optical enclosures | Biocompatible, smooth, and easy to sanitize |
| Light diffusers or LED components | Clean light transmission and easy shaping |
| Precision CNC work | Tight tolerances and excellent edge quality when machined |
If you’re working on any CNC project where appearance, lightness, and precision matter, PMMA material should absolutely be on your radar.
One Last Tip
Start with cast PMMA if you’re unsure. It’s more forgiving during CNC work, polishes better, and produces less heat under cutting loads. That’s the material I always reach for when surface quality really counts.
Looking Ahead
With rising demand for lightweight, high-performance materials across industries—especially in medical, consumer electronics, and architecture—PMMA material will only become more important. And CNC machining will remain one of the most flexible, scalable, and cost-effective ways to shape it.
Now that you’ve got the fundamentals, charts, cutting strategies, and real-world cases, I hope this guide empowers you to take on your own PMMA machining work with clarity and confidence.
Further Reading and References
- Wikipedia – PMMA
https://en.wikipedia.org/wiki/Poly(methyl_methacrylate)
https://mae.ufl.edu/designlab/LabAssignments/Drilling.pdf - LittleMachineShop – Tap & Drill Size Chart (Acrylic Compatible)
https://littlemachineshop.com/reference/tapdrill.php - Wikipedia – Machining
https://en.wikipedia.org/wiki/Machining
Other Articles You Might Enjoy
- Plexiglass vs Acrylic: A Complete Guide to Properties, Applications, and Fabrication for Your Project Needs
I. Introduction: Why Compare Plexiglass and Acrylic? I’ve noticed that many people—myself included—sometimes wonder about the differences between plexiglass and acrylic. Both terms are often used interchangeably. But there are…
- Custom Acrylic Frames Guide: Techniques, Tools, and Best Practices
Introduction Acrylic frames are widely appreciated for their elegance, durability, and versatility across various industries. Whether it’s for advertising displays, home decor, or precision-made electronic enclosures, acrylic frames provide a…
- Laser Cut Acrylic: A Complete Guide to Precision CNC Cutting Techniques and Best Practices
Introduction When I first started using CNC laser cutting technology, acrylic quickly became my favorite material.It’s versatile, beautiful, and easy to shape into detailed designs.But achieving the perfect laser cut…
- Best CNC-Cut Acrylic Signs for Retail and Events: Design and Production Guide
Chapter I:Introduction I want to start by sharing how I first realized the power of CNC-cut acrylic signs.I was working with a small retail client who wanted eye-catching store signage…
- Hard Plastic Sheets Explained For Makers And Machinists: Which One Is Right for Your Project?
Chapter 1: Introduction I've worked in manufacturing and DIY fabrication for years, frequently handling all types of materials. Among these, hard plastic sheets consistently proved versatile and reliable for various…
- Choosing Between Acrylic and Polycarbonate for CNC Machining: Clarity, Durability, and Machinability
Introduction to CNC Machining and Material Choices CNC machining, also known as Computer Numerical Control machining, is a critical aspect in the field of manufacturing. This process utilizes computerized controls…
- Acetal vs Delrin for Machining: A Complete Guide for Engineers and Designers
Introduction When I first started working with plastics in CNC machining, one question kept coming up: Acetal vs Delrin – what’s the difference, and which one should I use? It sounded like…
- Hemiacetal vs Acetal: Understanding Chemistry, Key Properties, and Best Machining Practices
Why "Hemiacetal vs Acetal" Matters in CNC Machining In my years of experience in the field of materials science and CNC machining, I've had the opportunity to work with a…
- Plastic CNC Machining Services with PEEK for Complex Components
Introduction to Plastic CNC Machining Services with PEEK The field of manufacturing has embraced the revolutionizing technology of Computer Numerical Control (CNC) machining, taking plastic component production to advanced levels.…