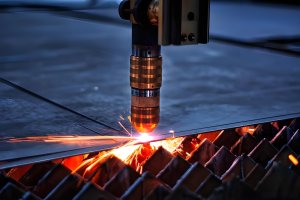
If there is one aspect that distinguishes CNC machining, it is its remarkable accuracy and precision. However, like any manufacturing process, CNC machining can still yield variations in the dimensions of the parts being produced. Factors such as the choice of material, spindle alignment, tooling accuracy, work holding rigidity, coolant usage, and shape complexity significantly impact the dimensional accuracy during the machining process.
To ensure the functionality and quality of the final product, engineers and designers establish specific CNC machining tolerances for parts during the design phase. In this article, we will delve into the significance of machining tolerances, their necessity, and explore methods to achieve precise and accurate CNC parts.
Importance of Adhering to CNC Machining Tolerances
CNC machining tolerances play a critical role in identifying whether a part is acceptable or deemed as scrap. These tolerances define the permissible limits for dimensional variations, providing insight into the room for error during the machining process. Let’s examine why adhering to tolerances is of utmost importance:
1. Cost Control
In the realm of business, cost reduction is a primary objective while maintaining the desired part quality. Tighter tolerances generally lead to increased costs. Parts with very tight machining tolerances often require additional processes such as grinding or superfinishing, which add to the expenses. On the other hand, less strict tolerances can be achieved through basic machining processes, resulting in cost savings.
By defining tolerances, manufacturers can avoid excessive costs associated with machining a part. They can designate tight tolerances only for critical areas of the part, effectively reducing the overall cost of manufacturing components. This strategic approach helps determine which features require stringent tolerances and which ones can tolerate greater variations, optimizing the production process.
2. Interchangeability and Repeatability of Parts
In the world of machining, most parts will eventually interface with other machined components during assembly or for other purposes. Interchangeability, therefore, becomes a crucial factor when fabricating high-volume parts. It allows components to seamlessly fit into any assembly of the same type.
Consider mating parts as a prime example. A controlled shaft must fit into its mating part, irrespective of dimensional variations. The same principle applies to sleeves and various other components. Interchangeability ensures smooth assembly and consistent functionality, facilitating efficient production processes.
3. Maintenance of Part Functionality
Machined parts often possess features that are vital to their overall functionality. In fixturing applications, where precise location and specific sizes are critical, any variation beyond the specified tolerances can render a fixture defective and unusable.
For instance, in fixturing applications where location and size are paramount, any variation beyond the specified tolerances can render the fixture defective and unusable. These tolerances enable manufacturers to maintain the functionality of their fixtures, ensuring that they function correctly and serve their intended purpose.
Types of Tolerances Used in a Machine Shop
Tolerances in manufacturing drawings can be expressed in various ways, depending on the feature being controlled and the design intent of the engineer. Here are the most common types of machining tolerances used in the industry:
| Linear Dimension Range (mm) | Tolerance Class | |||
| F (Fine) | M (Medium) | C (Coarse) | V (Very Coarse) | |
| 0.5 – 3 | ±0.05 | ±0.10 | ±0.20 | / |
| 4 – 6 | ±0.05 | ±0.10 | ±0.30 | ±0.50 |
| 7 – 30 | ±0.10 | ±0.20 | ±0.50 | ±1.00 |
| 31 – 120 | ±0.15 | ±0.30 | ±0.80 | ±1.50 |
| 121 to 400 | ±0.20 | ±0.50 | ±1.20 | ±2.50 |
| 401 – 1000 | ±0.30 | ±0.80 | ±2.00 | ±4.00 |
| 1001 – 2000 | ±0.50 | ±1.20 | ±3.00 | ±6.00 |
| 2001 – 4000 | / | ±2.00 | ±4.00 | ±8.00 |
1. Unilateral Tolerances
Unilateral tolerances allow variations in one direction only. Consider the example of fitting a shaft into the internal diameter of a sleeve. By applying unilateral tolerance to the shaft, the maximum shaft diameter must not exceed the sleeve’s inner diameter. This tolerance can be represented as 1.000 +0/-.005 inches. Unilateral tolerances are frequently employed for components with mating parts.
2. Bilateral Tolerances
In contrast to unilateral tolerances, bilateral tolerances permit variations in both the positive and negative directions from the nominal size. For example, a 1.000-inch dimension with a bilateral tolerance would be expressed as 1.000 +/- .005 inches. This type of tolerance allows equal distribution of the permissible variation and is commonly used to specify external dimensions.
3. Limit Tolerances
Limit tolerances are expressed as a range between the minimum and maximum allowable dimensions. The manufactured part’s dimension must fall within this range. In manufacturing drawings, limit tolerances are presented as .995-1.005 inches, indicating that the dimension for the manufactured part should lie between these values.
4. General/Standard Tolerances
General tolerances are established standards for common components in the industry. These standards cover items such as thread sizes, pin sizes, pipes, steel bars, and more. Regulatory associations like ASME, AISI, ISO, and others typically govern general tolerances. The control and specific dimensions for these tolerances are usually listed in table references.
Examples of general tolerances include calling out threads as coarse, fine, or extra-fine (UNC, UNF, UNEF) and specifying shaft and hole dimensions as fit tolerances like H7/g6, G7/h6, H8/g6 (e.g., slide fit, interference fit, snug fit, force fit, free-running fit).
5. Geometric Dimensioning and Tolerancing (GD&T)
GD&T provides a more comprehensive approach to tolerancing by using feature control frames to specify dimensional and form tolerances accurately. This method enables clearer control over CNC part features, including flatness, straightness, runout, perpendicularity, and position callouts. Designers find GD&T particularly useful for specifying the required CNC machining tolerances precisely.
Considerations When Dealing with Tolerances
When working with tolerances, several factors need to be taken into account to achieve optimal results. Here are a few key considerations:
- Find the Right Machining Facility Partner
When looking to outsource parts, it is crucial to collaborate with a trusted and established machining facility. Not all CNC machining service providers possess the capability to deliver extremely precise and accurate parts with tight tolerances. Look for facilities with extensive experience and state-of-the-art equipment, as they are better equipped to achieve tight tolerances.
- Maintain Work Holder Accuracy
Work holders play a significant role in ensuring CNC machining tolerances are achieved. These holders securely hold the part in place during machining and serve as reference points for accurate positioning. Ensuring the accuracy and stability of work holders are paramount to achieving desired tolerances.
- Use High-Performance Cutting Tools
The selection of cutting tools is another critical aspect influencing dimensional variations in workpieces. Incorrect utilization of cutting tools, tool deflection, and dull cutting edges can contribute to deviations from the desired tolerances. Tool deflection is particularly common in long-ended features like deep holes and long shafts. Dull cutting tools not only compromise part quality but also pose a threat to the accuracy of spindles. Therefore, utilizing high-performance cutting tools is essential for maintaining dimensional accuracy.
- Consider the Material Used
Different materials behave differently when exposed to the machining environment. Some materials are more challenging to machine accurately than others. Manufacturers need to account for material characteristics and adjust their machining techniques accordingly to achieve the desired dimensional accuracy.
In conclusion, CNC machining tolerances are vital for ensuring the quality and functionality of parts by establishing limits on dimensional variations. Implementing tolerances during the fabrication of piece parts helps control costs, ensure interchangeability, and maintain functionality. By understanding the various types of machining tolerances and considering critical factors when working with tolerances, manufacturers can achieve precise and accurate CNC parts.
Recommended Reads:
- Simplifying Complex Workpieces with CNC Machining Technology
- The Application of Coordinate Measuring Machines (CMM) in Modern Machine Shops
- How To Adapt Fixtures and Jigs for Intelligent Manufacturing
- How to Reduce the Cost of CNC Prototyping
- The Era of 5G: Transforming the World through Precision Machining
Other Articles You Might Enjoy
- CNC Machining Tolerances and Material Selection: Precision Engineering Insights
Introduction to CNC Machining, Tolerances and Material Selection CNC machining is a prevalent manufacturing process that entails the use of pre-programmed computer software to dictate the movement of factory machinery…
- Elevating Precision Standards through Chamfer in CNC Machining
1. Introduction: The Pursuit of Unparalleled Precision In the realm of CNC machining, precision is paramount. This section introduces the article by exploring the significance of precision in manufacturing and…
- Precision Prowess: Unveiling the Advantages of China CNC Machining
1. Introduction: The Role of Precision in Manufacturing Excellence In this introductory section, we delve into the critical role that precision plays in manufacturing and set the stage for an…


